Achilles tendon rupture is a severe injury requiring structured rehabilitation. This guide outlines essential exercises and protocols for recovery, focusing on strengthening, flexibility, and gradual progression to prevent re-injury.
Overview of Achilles Tendon Rupture and Rehabilitation
An Achilles tendon rupture is a complete or partial tear of the tendon connecting the calf muscles to the heel bone. Rehabilitation focuses on restoring strength, flexibility, and function. Early treatment often involves immobilization, followed by gradual exercises to promote healing. A structured rehab program, including strengthening and mobility exercises, is crucial for full recovery and preventing future injuries.
Importance of Structured Rehab Exercises
Structured rehabilitation exercises are vital for Achilles tendon recovery. They ensure proper healing, prevent re-rupture, and restore strength and flexibility. A well-designed program addresses pain, promotes tendon repair, and gradually reintroduces movement. Consistency and progression are key to achieving full functional recovery and safely returning to daily activities or sports, minimizing the risk of long-term impairment or chronic issues.

Key Phases of Achilles Tendon Rehabilitation
Achilles tendon rehabilitation involves three main phases: acute, strengthening, and return to activity. Each phase focuses on healing, rebuilding strength, and restoring function to ensure a successful recovery.
Acute Phase (0-2 Weeks Post-Injury)
The acute phase focuses on reducing pain, inflammation, and immobilizing the tendon. Immediate care includes rest, ice, compression, and elevation. Immobilization with a cast or brace is crucial to protect the tendon. Pain management and anti-inflammatory medications may be prescribed. Gentle ankle mobilization and isometric exercises can begin once pain allows, aiming to maintain muscle tone and prevent atrophy without stressing the tendon further.
Strengthening Phase (2-6 Weeks Post-Injury)
The strengthening phase focuses on restoring tendon strength and muscle function. Weight-bearing exercises, such as calf raises and heel raises, are introduced to gradually load the tendon. Resistance band exercises and single-leg stability work enhance strength and balance. Progression is slow to avoid overloading, with the goal of improving functional movement and preparing for more dynamic activities in later phases.
Return to Activity Phase (6-12 Weeks Post-Injury)
The return to activity phase emphasizes functional rehabilitation, focusing on plyometric drills, agility exercises, and sport-specific movements. Low-impact plyometrics and balance training are introduced to restore power and coordination. Gradual reintroduction to daily activities and sports ensures a safe transition, with continued strengthening and flexibility work to maintain tendon health and prevent re-injury.

Early-Stage Rehab Exercises
Focus on gentle ankle mobilization, seated calf stretches, and isometric exercises to promote healing, maintain mobility, and prevent stiffness without overloading the tendon.
Gentle Ankle Mobilization Techniques
Gentle ankle mobilization helps restore range of motion and reduce stiffness post-injury. Techniques include dorsiflexion, plantarflexion, inversion, and eversion exercises. These movements are performed passively or actively, depending on the healing stage. The goal is to improve circulation and prevent scar tissue formation. Mobilization should be done carefully to avoid pain or stress on the tendon, ensuring a gradual return to normal ankle function.
Seated Calf Stretches
Seated calf stretches are essential for improving Achilles tendon flexibility and reducing muscle tightness. Sit with legs extended, loop a towel or strap around the ball of the foot, and gently pull toward the body. Hold for 20-30 seconds, repeating 3-4 times. This exercise enhances calf muscle length and promotes tendon healing without putting excessive strain on the repair site.
Isometric Exercises for Tendon Stability
Isometric exercises are crucial for strengthening the Achilles tendon without movement. Examples include wall pushes and seated heel raises, where the muscle contracts without joint movement. These exercises enhance tendon stability, improve strength, and minimize the risk of overloading the tendon during early rehabilitation. Perform 3-4 sets of 10-15 second holds, gradually increasing duration as strength improves.
Strengthening Exercises
Strengthening exercises are vital for rebuilding Achilles tendon integrity post-injury. Focus on calf raises, resistance bands, and single-leg exercises to gradually restore tendon strength and functionality.
Calf Raises and Heel Raises
Calf raises and heel raises are fundamental exercises for strengthening the Achilles tendon and surrounding muscles. Begin with double-leg raises, progressively transitioning to single-leg exercises. Stand on a flat surface, slow raising your heels off the ground, holding for 2-3 seconds, then lowering. Incorporate resistance bands or weights as strength improves. Proper form and controlled movements are crucial to avoid re-injury and ensure effective tendon repair.
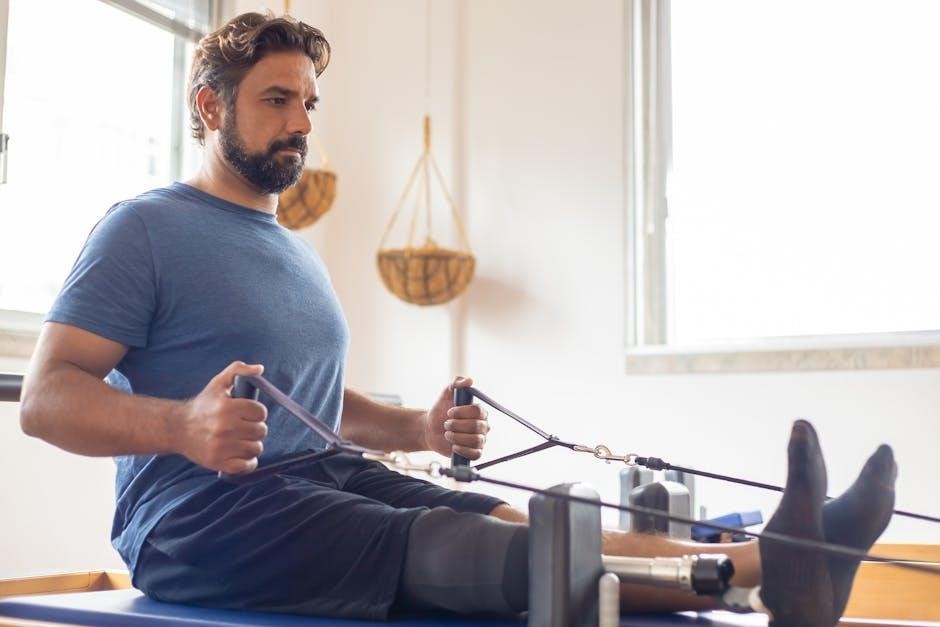
Resistance Band Exercises
Resistance band exercises are effective for strengthening the calf muscles and Achilles tendon. Use a looped band around the forefoot, anchoring it with your hands. Perform plantar flexion by pressing the foot downward, then slowly return. Incorporate side-to-side movements and controlled stretches. Progress to single-leg exercises as strength improves. These exercises enhance tendon resilience and promote functional movement, aiding in the recovery process without overloading the tendon prematurely.
Single-Leg Balance and Strengthening
Single-leg balance exercises target ankle stability and Achilles tendon strength. Stand on the affected leg, keeping the other foot lifted. Hold for 30-60 seconds, gradually increasing duration. Use resistance bands for added challenge. Focus on maintaining proper posture and engage core muscles for stability. This exercise improves balance, strength, and neuromuscular control, essential for restoring functional movement and preventing future injuries.
Mobility and Flexibility Exercises
Mobility and flexibility exercises are crucial for restoring Achilles tendon function. Dynamic stretching and foam rolling improve tissue elasticity, reducing stiffness and enhancing recovery. Essential for tendon health.
Dynamic Stretching for Achilles Tendon
Dynamic stretching enhances Achilles tendon flexibility and range of motion. Exercises like ankle pumps, calf swings, and high knees promote blood flow and reduce stiffness. Gentle, controlled movements help restore tendon elasticity without overloading. Regular practice improves mobility, supporting the healing process and preparing for more intense rehab phases. Consistency is key to achieving optimal tendon recovery and function.
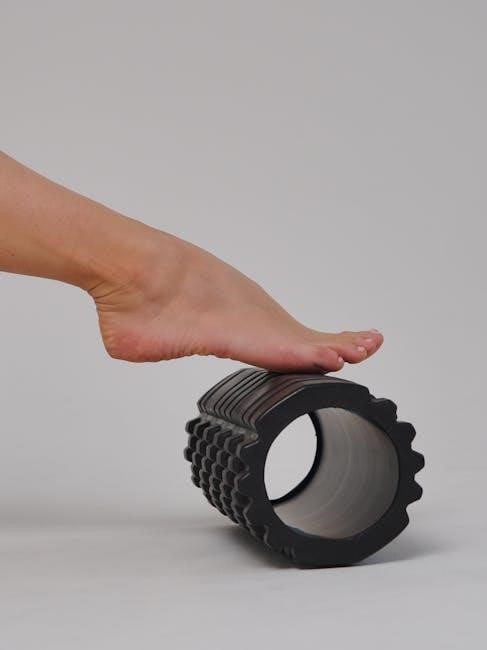
Foam Rolling and Self-Myofascial Release
Foam Rolling and Self-Myofascial Release
Foam rolling and self-myofascial release are essential for improving circulation and reducing muscle tension around the Achilles tendon. Gentle rolling of the calf and heel promotes tissue relaxation, aiding in scar tissue breakdown and stiffness reduction. Regular practice enhances flexibility and supports tendon repair. These techniques complement structured rehab exercises, fostering a smoother recovery process and maintaining tissue health throughout rehabilitation.
Plyometric and Agility Drills
Plyometric and agility drills restore explosive power and functional movement post-injury. Exercises like box jumps and lateral bounds enhance tendon resilience, preparing for high-impact activities and sports.
Low-Impact Plyometrics
Low-impact plyometric exercises introduce controlled explosiveness without excessive stress. Techniques like mini-trampoline jumps and step-ups reduce tendon strain. These drills improve power and reactivity, essential for sports, while minimizing injury risk. Proper form and gradual progression are crucial to avoid overloading the tendon. Supervised practice ensures safety and effectiveness in rebuilding strength and agility post-rehabilitation.
Agility Drills for Functional Movement
Agility drills enhance speed, coordination, and reaction time, mimicking real-world movements. Exercises like cone drills, ladder runs, and shuttle sprints improve functional mobility. These drills restore natural movement patterns, preparing the tendon for dynamic activities. Controlled progression ensures safety, while proper form prevents overloading. Agility training is crucial for athletes, bridging strength gains to sports-specific performance, fostering confidence and readiness for return to play.
Balance and Proprioception Training
Balance and proprioception exercises restore stability and awareness, crucial for functional recovery post-injury. These drills enhance neuromuscular control, reducing the risk of reinjury and improving overall mobility.
Single-Leg Stance Exercises
Single-leg stance exercises improve balance, stability, and proprioception, essential for Achilles tendon recovery. Stand on the affected leg, hold 30 seconds, and repeat 3 sets. Gradually increase difficulty by closing eyes or using unstable surfaces like BOSU balls. Proper form ensures effective rehabilitation and reduces reinjury risk. Strengthening the surrounding muscles enhances overall lower limb stability and functional movement patterns during recovery.
BOSU Ball and Wobble Board Training
BOSU ball and wobble board exercises enhance proprioception and balance by challenging the lower limb on unstable surfaces. Perform single-leg stands, balance reaches, and dynamic movements to strengthen the Achilles tendon and surrounding muscles. These tools simulate real-life movements, improving functional strength and stability. Gradual progression ensures safety and effectiveness, promoting a robust return to activity and reducing reinjury risks during rehabilitation.
Progression Criteria for Rehab Exercises
Progression is guided by pain levels, strength assessments, and functional abilities. Clinician evaluation ensures safe advancement through rehab phases, tailoring exercises to individual recovery needs and goals.
Pain and Discomfort Levels
Pain levels are a critical indicator in Achilles tendon rehabilitation. Patients should report discomfort on a scale of 0-10, with exercises adjusted to avoid exacerbating pain. Mild pain during activity is acceptable, but sharp or persistent pain signals a need to modify or cease the exercise. Monitoring ensures the tendon heals without overloading, preventing setbacks and promoting a safe recovery environment.
Strength and Functional Assessments
Regular strength and functional assessments are vital to track progress in Achilles tendon rehabilitation. These evaluations measure improvements in calf strength, ankle mobility, and overall functionality. Clinicians use standardized tests, such as single-leg heel raises and balance exercises, to determine readiness for progression to more advanced activities, ensuring a safe and effective return to full function and reducing the risk of re-injury.
Common Mistakes to Avoid in Achilles Rehab
Overloading the tendon too early is a common mistake, leading to prolonged recovery or re-injury. Gradual progression and allowing sufficient healing time are crucial for optimal outcomes.
Overloading the Tendon Too Early
Overloading the Achilles tendon too early can lead to prolonged recovery or re-injury. Gradual progression is essential to avoid excessive stress on the healing tendon. Ignoring pain signals or rushing through exercises can disrupt the repair process. It’s critical to balance activity with rest, ensuring the tendon strengthens without being overstrained. Proper adherence to rehab timelines and professional guidance is vital to prevent setbacks and promote full recovery.
Ignoring Proper Form and Technique
Ignoring proper form and technique during Achilles tendon rehab can lead to poor healing, muscle imbalances, and increased risk of re-injury. Incorrect movement patterns may strain the tendon or surrounding tissues, delaying recovery. It’s essential to focus on precise execution of exercises, often under professional guidance, to ensure safety and effectiveness throughout the rehabilitation process. Consistency and attention to detail are key to a successful recovery.
Role of Physical Therapy in Rehab
Physical therapy provides tailored exercises and techniques to enhance mobility, strength, and function, crucial for a successful Achilles tendon rupture recovery and preventing future injuries.
Customized Exercise Programs
Physical therapists create personalized exercise plans tailored to the patient’s injury severity, fitness level, and recovery goals. These programs often include gentle mobilization, strengthening exercises, and flexibility routines. The therapist assesses the patient’s progress and adjusts the exercises accordingly. Customized programs ensure targeted rehabilitation, addressing specific weaknesses and promoting optimal healing. Adherence to these plans is crucial for achieving full recovery and preventing future injuries.
Manual Therapy and Modalities
Manual therapy, including massage and joint mobilization, enhances tendon mobility and reduces scar tissue. Modalities like ultrasound and electrical stimulation promote healing and pain relief. These techniques, combined with exercises, improve recovery outcomes. Physical therapists tailor these methods to address individual needs, ensuring a comprehensive approach to rehabilitation and optimizing the healing process of the Achilles tendon.

Preventing Reinjury
Gradual return to sports and consistent strengthening exercises are crucial. Monitoring progress and maintaining proper techniques help prevent future injuries, ensuring long-term tendon health and stability.
Gradual Return to Sports
A gradual return to sports is essential to prevent reinjury. Athletes should progress slowly, ensuring the tendon can handle increased demands. Criteria for return include full strength, pain-free movement, and functional stability. Rushing back can lead to re-rupture or chronic issues. A structured, personalized plan, monitored by healthcare professionals, is critical for safe reintegration into athletic activities and long-term success.
Long-Term Strengthening and Maintenance
Long-term strengthening and maintenance are crucial for Achilles tendon health post-rehabilitation. Continuous engagement in exercises like calf raises, resistance band work, and plyometrics helps maintain tendon integrity. Regular stretching and mobility exercises prevent stiffness and promote flexibility. Adherence to a maintenance routine reduces the risk of future injuries and supports overall lower limb function and athletic performance effectively.
Effective Achilles tendon rupture rehabilitation requires patience, adherence to structured exercises, and gradual progression. Proper care ensures long-term recovery, strength, and return to full functional mobility and activity.
Final Thoughts on Effective Rehab
Effective Achilles tendon rupture rehabilitation hinges on patience, adherence to structured exercises, and avoiding common pitfalls. Gradual progression, proper form, and professional guidance are paramount. Incorporating strengthening, mobility, and balance exercises ensures a robust recovery. Overloading the tendon prematurely and neglecting form can lead to setbacks. Successful rehab restores strength, mobility, and functional ability, enabling a safe return to daily activities and sports.
Importance of Adherence to Rehab Plan
Consistent adherence to a well-structured rehabilitation plan is critical for optimal recovery from an Achilles tendon rupture. Proper healing, strength restoration, and mobility rely on following prescribed exercises and timelines. Deviating from the plan can delay progress or lead to re-injury. Commitment to the program ensures a safer, more effective return to normal function and reduces the risk of long-term complications.