2017 audi a4 manual transmission

2017 Audi A4 Manual Transmission: Overview

The 2017 Audi A4 offers a precise 6-speed manual transmission‚ delivering smooth shifting and enhanced driver engagement. It pairs seamlessly with the 2.0L turbocharged engine‚ ensuring optimal performance and fuel efficiency while maintaining the sporty feel that Audi is known for.

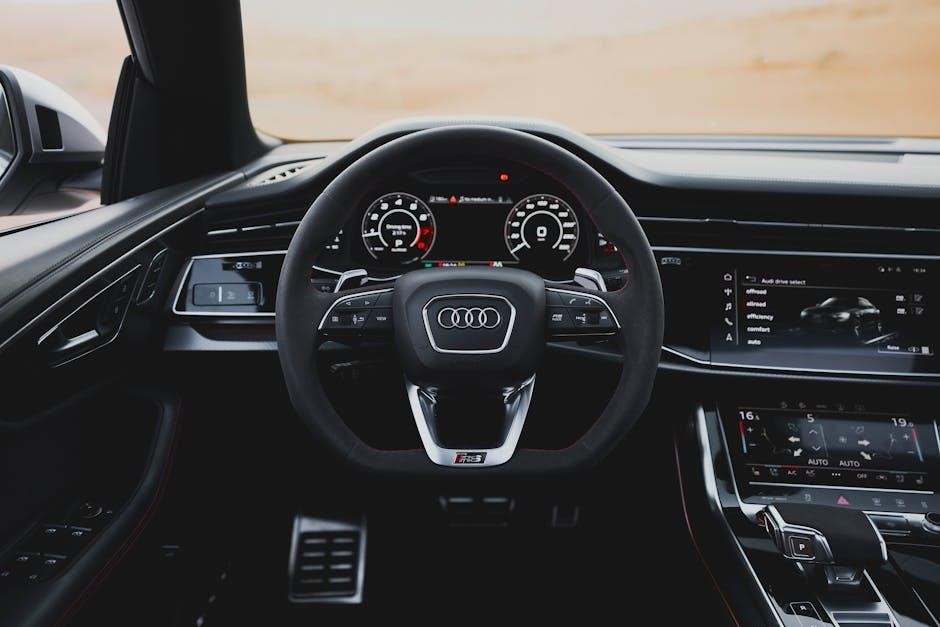
The 2017 Audi A4 represents a refined blend of luxury‚ technology‚ and performance. Known for its sleek exterior design and premium interior‚ the A4 offers a comfortable yet sporty driving experience. Equipped with advanced features like a 2.0-liter turbocharged engine and optional quattro all-wheel drive‚ it delivers impressive power and efficiency. The A4 is celebrated for its balanced handling and responsive steering‚ making it a favorite among enthusiasts. With a focus on innovation and reliability‚ the 2017 model stands out as a versatile choice for both daily commuting and spirited driving‚ appealing to a wide range of drivers.

Manual Transmission Features and Benefits

The 2017 Audi A4 manual transmission offers precise control and a sporty driving feel. Its 6-speed design ensures smooth shifting and optimal acceleration. By engaging the driver more actively‚ it enhances the overall driving experience. Fuel efficiency is improved compared to automatic models‚ making it a cost-effective choice. The manual transmission also reduces maintenance costs over time. With its lightweight and compact design‚ it contributes to better handling and responsiveness. For enthusiasts‚ the manual option provides a purer connection to the road‚ delivering a more authentic and engaging performance that aligns with Audi’s reputation for exceptional driving dynamics and precision engineering.

Key Features of the 2017 Audi A4 Manual Transmission

The 2017 Audi A4 manual transmission includes a 6-speed gearbox with precise shifting‚ lightweight design‚ and optimized gear ratios for enhanced performance and fuel efficiency.

Transmission Specifications and Design

The 2017 Audi A4 manual transmission features a 6-speed gearbox designed for precision and durability. Constructed with lightweight materials‚ it ensures optimal weight distribution and nimble handling. The transmission’s gear ratios are meticulously calibrated to balance performance and fuel efficiency‚ offering smooth acceleration across all speeds. Its robust design minimizes wear and tear‚ while the synchronized gears provide crisp‚ responsive shifts. Additionally‚ the manual transmission is paired with a hydraulic clutch system‚ enhancing pedal feel and driver control. This combination makes the 2017 Audi A4 a standout choice for enthusiasts who value both performance and driving engagement.

Engine and Performance Combination

The 2017 Audi A4 manual transmission is paired with a 2.0L turbocharged TFSI engine‚ delivering 252 horsepower and 273 lb-ft of torque. This combination offers a sporty driving experience‚ with the manual gearbox enhancing control and responsiveness; The engine’s ample torque ensures smooth acceleration‚ while the transmission’s optimized gear ratios maximize power delivery. Designed for both performance and efficiency‚ the pairing achieves an impressive balance‚ making it ideal for enthusiasts who value precision and agility. The manual transmission complements the engine’s capabilities‚ providing a driving experience that is both exhilarating and refined.

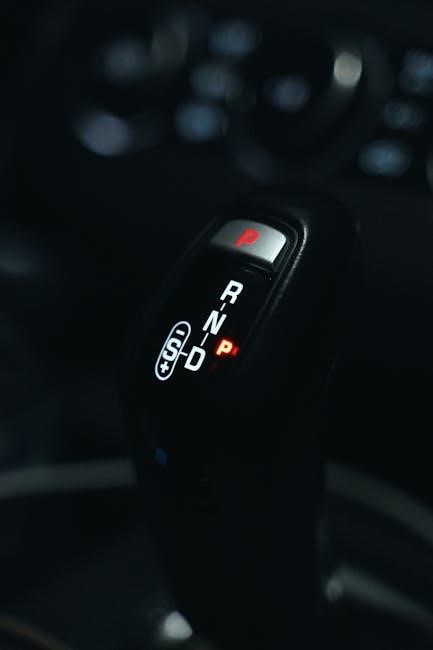
Driving Modes and Gear Shift Quality

The 2017 Audi A4’s manual transmission excels with precise‚ smooth gear shifts‚ offering a tactile connection to the drive. The car features multiple driving modes‚ including Comfort‚ Dynamic‚ and Manual‚ allowing drivers to tailor their experience. In Dynamic mode‚ shifts are quicker and more responsive‚ enhancing sporty driving. The clutch pedal provides a balanced feel‚ making it easy to navigate both city traffic and winding roads. Audi’s attention to detail ensures that every shift is crisp and deliberate‚ contributing to a satisfying and engaging driving experience that resonates with enthusiasts who appreciate mechanical interaction.

Maintenance and Care for the Manual Transmission

Regular transmission fluid changes every 30‚000 to 60‚000 miles are essential for smooth operation. Inspect for leaks and wear on seals and clutch components periodically to ensure optimal performance.

Recommended Service Intervals

For the 2017 Audi A4 manual transmission‚ Audi recommends transmission fluid changes every 30‚000 to 60‚000 miles‚ depending on driving conditions. Regular inspections of gaskets‚ seals‚ and clutch components are advised to prevent leaks and wear. It’s also important to check the transmission fluid level every 5‚000 miles and top it off as needed. Additionally‚ synchronizing the fluid changes with the engine oil service ensures optimal performance. Always consult the owner’s manual or a certified Audi technician for personalized maintenance schedules tailored to your driving habits and mileage.

Transmission Fluid Replacement Guidelines

The 2017 Audi A4 manual transmission requires synthetic automatic transmission fluid (ATF) to ensure smooth operation and longevity. Fluid replacement is typically recommended every 30‚000 to 60‚000 miles‚ depending on driving conditions. Before replacing‚ warm up the transmission by driving for a few minutes to ensure accurate fluid level readings. Drain the old fluid‚ inspect for contaminants‚ and refill with the specified Audi-approved synthetic ATF. Avoid using incorrect fluids‚ as they can damage seals and affect performance. Always refer to the owner’s manual or consult a certified technician for precise guidelines to maintain optimal transmission health and prevent premature wear.

DIY Maintenance Tips

Regular DIY maintenance for the 2017 Audi A4 manual transmission involves checking the clutch pedal adjustment to ensure proper engagement. Inspect the gearshift and linkage for tightness and alignment. Clean the shift knob and surrounding areas to prevent dirt buildup. Lubricate the shift components with lithium-based grease for smooth operation. Monitor the clutch for wear and replace it if slipping occurs. Always refer to the owner’s manual for specific guidelines. These simple steps can help maintain the transmission’s performance and extend its lifespan‚ ensuring a smooth and responsive driving experience. Regular checks can also help identify potential issues early.

Troubleshooting Common Issues

The 2017 Audi A4 manual transmission may experience hesitation or refusal to shift into gear‚ often accompanied by a “Transmission Malfunction” error message. These issues can indicate mechanical or software-related problems within the transmission system.

Transmission Malfunction Symptoms

Common symptoms of a malfunctioning manual transmission in the 2017 Audi A4 include delayed or abrupt gear shifts‚ difficulty engaging gears‚ and an illuminated “Transmission Malfunction” warning on the dashboard. Drivers may also notice a lack of response when accelerating‚ especially when shifting into higher gears. In some cases‚ the car may unexpectedly revert to Neutral or exhibit jerking movements. These issues often stem from software glitches‚ faulty sensors‚ or mechanical wear within the transmission system. Addressing these symptoms promptly is crucial to prevent further damage and ensure continued smooth operation of the vehicle.

Common Error Codes and Solutions

The 2017 Audi A4 manual transmission may display error codes such as “Transmission Malfunction” or “Gear Shift Not Engaged.” These issues often stem from faulty sensors‚ software glitches‚ or mechanical wear. Solutions include resetting the transmission control module‚ inspecting clutch and gear sensors‚ or replacing worn components like the clutch master cylinder. In some cases‚ updating the transmission software resolves the problem. If symptoms persist‚ professional diagnosis is recommended to prevent further damage. Addressing these codes promptly ensures optimal performance and prevents costly repairs down the line.

Modifications and Upgrades

Engine tuning and lightweight components can enhance performance. Upgrading to an S-Tronic dual-clutch transmission is also a popular modification for improved efficiency and driving dynamics.

Performance Enhancements for Manual Transmission

Performance upgrades for the 2017 Audi A4’s manual transmission include lightweight flywheels and high-performance clutches to improve acceleration and reduce shifting lag. Engine tuning can also optimize power delivery‚ extracting maximum torque from the 2.0L turbocharged engine. Additionally‚ upgrading to a short-shift kit enhances gear shift precision and reduces throw distances‚ providing a more responsive driving experience. These modifications not only improve performance but also maintain the balance and refinement Audi is known for‚ making the A4 even more thrilling to drive.

Cosmetic and Functional Modifications

Cosmetic and functional modifications for the 2017 Audi A4 manual transmission focus on enhancing both style and usability. Interior upgrades like sport seats‚ carbon fiber trim‚ and aluminum gearshift knobs add a premium feel. Exterior modifications such as spoilers‚ diffusers‚ and lightweight alloy wheels improve aesthetics and aerodynamics. Functional upgrades include performance exhaust systems for a sportier sound and LED lighting for better visibility. These modifications allow owners to personalize their A4 while maintaining its sophisticated design and driving capabilities‚ ensuring a balance between form and function that complements the manual transmission’s dynamic performance.

The 2017 Audi A4 manual transmission offers a refined blend of performance‚ efficiency‚ and driving satisfaction‚ making it a compelling choice for enthusiasts seeking a balanced and engaging experience.

Final Thoughts on the 2017 Audi A4 Manual Transmission

The 2017 Audi A4 with a manual transmission stands out as a driver-focused vehicle‚ offering precise control and a sporty feel. Its 6-speed gearbox complements the 2.0L turbocharged engine‚ delivering smooth acceleration and excellent fuel efficiency. Owners appreciate the tactile connection to the car‚ making every drive engaging. While maintenance and potential transmission issues should be considered‚ the overall experience is rewarding. For enthusiasts seeking a balance of performance and practicality‚ the manual A4 remains a standout choice in its class.

Owning and Driving Experience

Owning a 2017 Audi A4 with a manual transmission offers a blend of luxury and driving excitement. The precise gearshift and responsive engine create a connected driving experience. Owners highlight the car’s agility and smooth handling‚ making it ideal for both city commutes and winding roads. Regular maintenance is key to longevity‚ but the overall ownership experience is satisfying. The manual transmission enhances driver engagement‚ providing a sense of control that automatics often lack. For those who enjoy driving‚ the A4 manual is a rewarding choice‚ combining Audi’s refinement with the joy of manual driving.

diamante black manual reclining loveseat

The Diamante Black Manual Reclining Loveseat offers a sleek‚ modern design with a manual reclining mechanism for ultimate comfort and relaxation․ Its black color and durable material ensure timeless style and versatility in any home decor setting․

Perfect for small spaces or cozy living areas‚ this loveseat combines practicality with elegance‚ making it an excellent choice for those seeking both functionality and aesthetic appeal․

1․1 Overview of the Product

The Diamante Black Manual Reclining Loveseat is a stylish and functional seating solution designed for modern living spaces․ It features a manual reclining mechanism‚ offering adjustable comfort for relaxation․ Crafted with durable materials‚ this loveseat combines sleek aesthetics with practicality‚ making it ideal for cozy living rooms or compact areas․ Its black finish and versatile design ensure it complements a variety of interior styles while providing lasting comfort and support․

1․2 Key Features and Benefits

The Diamante Black Manual Reclining Loveseat boasts a manual reclining mechanism for effortless adjustment‚ providing optimal comfort and support․ Its space-saving design makes it ideal for smaller rooms while maintaining a stylish appearance․ The loveseat features durable construction‚ ensuring longevity‚ and its sleek black finish complements various interior styles․ It offers a perfect blend of practicality and elegance‚ making it a versatile addition to any living space․

Design and Style of the Diamante Black Manual Reclining Loveseat

The Diamante Black Manual Reclining Loveseat features a sleek‚ modern design with clean lines and a sophisticated black finish‚ blending seamlessly into contemporary home decor styles․

2․1 Color and Material Options

The Diamante Black Manual Reclining Loveseat is available in a sleek black color‚ offering a timeless and versatile option for home decor․ Crafted from durable materials‚ it combines comfort with a modern aesthetic‚ ensuring long-lasting performance and style․ The black finish complements various interior designs‚ making it a practical choice for both classic and contemporary spaces․

2․2 Modern Aesthetic and Space-Saving Design

The Diamante Black Manual Reclining Loveseat features a sleek‚ modern aesthetic with clean lines and a minimalist silhouette․ Its space-saving design makes it ideal for smaller rooms or apartments‚ offering comfort without compromising on style․ The compact footprint allows for easy placement in cozy living areas‚ while its contemporary look enhances the visual appeal of any space‚ creating a sense of openness and sophistication․

Features of the Manual Reclining Mechanism

The manual reclining mechanism offers smooth‚ easy operation‚ allowing users to adjust their seating position effortlessly․ Its durable design ensures long-lasting performance and reliable comfort․

3․1 How the Reclining Function Works

The Diamante Black Manual Reclining Loveseat features a side-mounted handle that allows users to effortlessly adjust the reclining position․ The mechanism operates smoothly‚ enabling a seamless transition between upright and reclined positions․ With a sturdy frame and reliable engineering‚ the loveseat ensures consistent performance‚ providing optimal comfort and support for various relaxation needs․

3․2 Adjustability and Comfort Options

The Diamante Black Manual Reclining Loveseat offers exceptional adjustability‚ with a side-mounted handle for easy reclining control․ The loveseat provides multiple reclining positions‚ allowing users to customize their comfort․ Its plush cushioning and supportive design ensure long-lasting relaxation‚ while the sturdy frame maintains stability․ This combination of adjustability and ergonomic design makes it an ideal choice for enhancing comfort in any living space․

Benefits of Owning the Diamante Black Manual Reclining Loveseat

The Diamante Black Manual Reclining Loveseat offers the perfect blend of comfort and style‚ making it a great addition to any living space․ Its sleek design and durability ensure it remains a timeless piece‚ while its compact size makes it ideal for small or cozy areas‚ enhancing relaxation and ambiance․

Owning this loveseat provides long-lasting comfort and versatility‚ with its manual reclining feature allowing for customizable relaxation․ Its elegant black finish complements various home decor styles‚ making it a practical and stylish investment for any home․

4․1 Durability and Longevity

The Diamante Black Manual Reclining Loveseat is crafted with a sturdy frame and high-quality upholstery‚ ensuring long-lasting durability․ Its manual reclining mechanism is designed for smooth operation over time‚ while the sleek black finish resists fading․ Built to withstand everyday use‚ this loveseat offers a reliable and comfortable seating solution that maintains its style and functionality for years to come․

With proper care‚ its robust construction and premium materials guarantee extended longevity‚ making it a worthwhile investment for any home setting․

4․2 Versatility in Home Decor

The Diamante Black Manual Reclining Loveseat seamlessly integrates into various home decor styles‚ from modern to traditional․ Its sleek black finish and neutral design make it a versatile addition to any living space‚ complementing both minimalist and elaborate interiors․

Whether placed in a cozy living room or a compact apartment‚ this loveseat adapts effortlessly to its surroundings‚ offering a practical yet stylish solution for diverse decor preferences and spatial needs․

Maintenance and Care Tips

Regularly vacuum or wipe the loveseat with a damp cloth to maintain its appearance․ Avoid harsh chemicals and ensure proper storage when not in use․

  • Use a soft fabric cleaner for stains․
  • Avoid direct sunlight to prevent fading․

5․1 Cleaning and Upholstery Maintenance

Regular maintenance ensures the Diamante Black Manual Reclining Loveseat remains pristine․ Use a mild leather cleaner or a damp cloth for spills․ Avoid harsh chemicals‚ as they may damage the material․ Vacuum cushions weekly to remove dust and dirt․ For tougher stains‚ gently blot with a soft‚ clean cloth․ Allow the area to air dry completely to prevent moisture buildup․ Avoid machine washing or soaking the upholstery‚ as this could compromise its integrity․

5․2 Tips for Prolonging Lifespan

To extend the life of your Diamante Black Manual Reclining Loveseat‚ avoid direct sunlight to prevent fading․ Use high-quality leather conditioners periodically to maintain suppleness․ Rotate cushions every few months for even wear․ Avoid placing heavy objects on the arms to prevent structural strain․ Attach felt pads to the legs to reduce friction and prevent floor scratches․ Regularly inspect and tighten loose screws to ensure stability and longevity․

Where to Buy the Diamante Black Manual Reclining Loveseat

The Diamante Black Manual Reclining Loveseat is available at authorized furniture retailers like Ashley Furniture HomeStore and online platforms such as Wayfair and Amazon․

Visit local furniture stores or check the manufacturer’s website for availability and to find the best deals in your area․

6․1 Authorized Retailers and Online Platforms

The Diamante Black Manual Reclining Loveseat is available at authorized retailers like Ashley Furniture HomeStore and online platforms such as Wayfair‚ Amazon‚ and the manufacturer’s official website․ These platforms offer secure transactions‚ warranty options‚ and customer support‚ ensuring a reliable shopping experience․ Additionally‚ online marketplaces provide convenient delivery options‚ making it easy to bring this stylish loveseat to your home․

Always purchase from authorized sellers to guarantee authenticity and warranty coverage․

6․2 Tips for Finding the Best Deals

To find the best deals on the Diamante Black Manual Reclining Loveseat‚ consider shopping during seasonal sales or holiday events․ Look for discount codes or promo offers on retailer websites․ Price comparison tools can help identify the lowest price across platforms․ Additionally‚ signing up for newsletters or following social media accounts of authorized retailers may provide exclusive offers or early access to promotions;

Combine purchases or inquire about bundle deals for added savings․

Customer Reviews and Feedback

Customers praise the Diamante Black Manual Reclining Loveseat for its comfort‚ sleek design‚ and durability․ Many highlight its ability to blend seamlessly with modern home decor styles․

Some users note minor assembly challenges‚ but overall satisfaction remains high due to its affordability and practical features․

7․1 Common Praises from Users

Users frequently commend the Diamante Black Manual Reclining Loveseat for its sleek‚ modern design and exceptional comfort․ Many appreciate its sturdy construction and high-quality materials‚ ensuring durability․ The manual reclining feature is praised for its smooth operation‚ while the compact size makes it ideal for smaller spaces․ Customers also highlight its affordability and how it effortlessly complements various home decor styles‚ making it a practical and stylish addition to any living area․

The loveseat’s ability to combine functionality with a sophisticated aesthetic has made it a favorite among those seeking comfort without compromising on style or space efficiency․

7․2 Potential Drawbacks and Solutions

Some users note that the Diamante Black Manual Reclining Loveseat may require assembly‚ which can be time-consuming for those less handy․ Additionally‚ the manual reclining mechanism‚ while smooth‚ may feel stiff initially․ A few customers mention that the weight capacity could be higher for larger individuals․

To address these‚ assembly can be simplified with a second person’s assistance․ Regular use of the reclining feature will ease its operation‚ and ensuring weight limits are not exceeded will maintain durability․ Overall‚ these minor drawbacks are outweighed by the loveseat’s comfort and style․

Accessories and Compatibility

The Diamante Black Manual Reclining Loveseat pairs well with complementary accessories like throw pillows and blankets for enhanced comfort․ Its manual mechanism ensures compatibility with various home decor styles‚ offering versatility and a seamless integration into any room’s aesthetic․

Optional ottomans or side tables can further elevate its functionality‚ creating a cozy and inviting seating arrangement tailored to your personal preferences and lifestyle needs․

8․1 Recommended Accessories for Enhancing Comfort

To elevate the comfort of the Diamante Black Manual Reclining Loveseat‚ consider adding plush throw pillows‚ soft blankets‚ or a matching ottoman for leg support․ A side table or tray can enhance convenience‚ while a neck pillow provides additional relaxation․ These accessories complement the loveseat’s design‚ ensuring a cozy and inviting seating experience tailored to your comfort needs․

Optional lumbar cushions or armrest covers can further personalize your comfort‚ making it an ideal choice for everyday relaxation or entertainment․

8․2 Compatibility with Home Decor Styles

The Diamante Black Manual Reclining Loveseat seamlessly integrates into various home decor styles‚ from modern to minimalist․ Its sleek black finish and clean lines complement contemporary spaces‚ while its neutral tone allows it to blend with traditional or rustic settings․ The loveseat’s versatile design makes it a perfect addition to any living room‚ offering a timeless appeal that enhances your home’s aesthetic without compromising on comfort or functionality․

Whether paired with bold accents or subtle decor‚ the loveseat’s understated elegance ensures it fits effortlessly into diverse interior designs‚ making it a practical and stylish choice for any homeowner․

The Diamante Black Manual Reclining Loveseat is a perfect blend of style‚ comfort‚ and durability‚ offering a timeless solution for enhancing your home’s aesthetic and relaxation experience․

Its versatility and sleek design make it an ideal choice for any living space‚ ensuring long-lasting satisfaction and a touch of modern elegance to your decor․

9․1 Final Thoughts on the Diamante Black Manual Reclining Loveseat

The Diamante Black Manual Reclining Loveseat is a standout piece‚ blending sleek design with exceptional comfort․ Its manual reclining mechanism offers effortless relaxation‚ while the black finish and premium materials ensure durability․ Perfect for modern or classic settings‚ this loveseat delivers both style and functionality‚ making it a worthwhile investment for any home seeking a balance of aesthetics and practicality․

9․2 Recommendations for Potential Buyers

Potential buyers seeking a blend of style‚ comfort‚ and durability should consider the Diamante Black Manual Reclining Loveseat․ Measure your space to ensure a perfect fit‚ and assess your budget for long-term value․ Prioritize comfort by testing the reclining mechanism and checking the material quality․ Read customer reviews for insights and compare prices across retailers to find the best deal․ This loveseat is an excellent choice for those looking to enhance their living area with a practical yet elegant piece․

lg lp0817wsr manual

Product Overview

The LG LP0817WSR is a portable air conditioner designed for efficient cooling and quiet operation, featuring WhisperQuiet Technology and a remote control for easy adjustments.

The LG LP0817WSR is a portable air conditioner designed for efficient cooling and quiet operation. It features WhisperQuiet Technology, ensuring low noise levels of 45 dB, making it ideal for home or office use. This compact unit is built for small to medium-sized spaces, providing reliable cooling performance while maintaining a sleek and modern design. With its portability and advanced cooling capabilities, the LG LP0817WSR is a practical solution for maintaining a comfortable environment year-round. Its remote control adds convenience, allowing easy adjustments from anywhere in the room.

1.2. Key Features of LG LP0817WSR

The LG LP0817WSR boasts innovative features like WhisperQuiet Technology, ensuring ultra-quiet operation at 45 dB. It includes a night mode that automatically adjusts settings for uninterrupted sleep. The unit is equipped with special sound insulation for the compressor, further reducing noise. A remote control provides easy operation, and its compact design suits small to medium spaces. These features make it an ideal choice for quiet, efficient cooling in any setting. Its portability and advanced technology ensure a seamless user experience.

Installation and Setup

The LG LP0817WSR requires minimal setup due to its portable design. Simply position the unit, connect the exhaust hose, and plug it into a power source.

2.1. Installation Requirements

The LG LP0817WSR requires a suitable location with proper ventilation. Ensure a nearby window for the exhaust hose and a level surface. The unit needs a 115V electrical outlet. Drainage setup is necessary for water collection. The window kit must be installed to secure the vent hose. Ensure the area is clear of obstructions for optimal airflow. Follow the manual’s guidelines for correct installation to avoid operational issues. Proper setup ensures efficient cooling and safe operation.

2.2. Step-by-Step Installation Guide

To install the LG LP0817WSR, start by unpacking all components. Attach the window kit to the exhaust hose and secure it in the window. Connect the hose to the unit and position it on a level surface. Ensure the window is tightly sealed to prevent air leaks. Plug in the unit and test operation. Drainage setup is required for water collection. Follow the manual for precise instructions to ensure proper installation and optimal performance.

Control Panel and Remote Control

The LG LP0817WSR features a user-friendly control panel with an LCD display and touch buttons for easy operation. The remote control allows seamless adjustments, including temperature, fan speed, and modes.

3.1. Understanding the Control Panel

The LG LP0817WSR control panel is designed for intuitive operation. It features an LCD display showing current settings, temperature, and mode. The touch-sensitive buttons allow users to adjust fan speed, temperature, and operating modes effortlessly. The panel also includes indicators for functions like Night Mode and WhisperQuiet Technology, ensuring users can monitor and control the unit’s operation with ease. This sleek interface enhances user experience, making it simple to customize settings for optimal comfort.

3.2. Remote Control Functions

The LG LP0817WSR comes with a remote control that offers convenient operation. Users can adjust temperature, fan speed, and operating modes from a distance. The remote includes buttons for turning the unit on/off, selecting cooling, heating, or fan mode, and adjusting louvers. It also features a Night Mode button for quieter operation during sleep. The remote’s intuitive design ensures easy navigation of settings, while its ergonomic shape provides comfort in use. This enhances user convenience and overall satisfaction with the unit.

Operation Modes

The LG LP0817WSR offers multiple operation modes, including cooling, heating, and fan-only options, providing year-round comfort with efficient temperature regulation and air circulation.

4.1. Cooling Mode

The LG LP0817WSR Cooling Mode efficiently lowers room temperature using advanced refrigeration technology. It features multiple fan speeds and a dehumidify function to enhance comfort. WhisperQuiet Technology minimizes noise, ensuring a peaceful environment. The remote control allows easy adjustment of settings. This mode is ideal for hot summer days, providing consistent cooling while maintaining energy efficiency. The unit automatically adjusts to maintain the set temperature, ensuring optimal performance and user satisfaction with minimal effort required.

4.2. Heating Mode

The LG LP0817WSR Heating Mode provides efficient warmth during colder months, utilizing advanced heat pump technology to maintain a cozy environment. It offers multiple heat settings and a programmable timer for precise control. WhisperQuiet Technology ensures minimal noise, even in heating mode. The remote control allows users to adjust temperatures effortlessly. This mode is designed to deliver consistent heat while optimizing energy use. The unit automatically adapts to maintain the desired temperature, ensuring comfort and efficiency throughout the year.

4.3. Fan Mode

The LG LP0817WSR Fan Mode circulates air without cooling or heating, making it an energy-efficient option for maintaining air circulation. This mode is ideal for mild weather or when you simply want to freshen the room. The WhisperQuiet Technology ensures low noise levels, even on higher fan speeds. With variable fan speeds, you can customize airflow to your comfort. Fan Mode operates independently of heating or cooling functions, providing a gentle breeze and improving indoor air quality throughout the year.

Safety Precautions

Always follow general safety guidelines to avoid accidents. Ensure proper installation, keep the unit away from flammable materials, and avoid electrical hazards. Regularly inspect cords and plugs for damage.

5.1. General Safety Guidelines

To ensure safe operation of the LG LP0817WSR, always follow these guidelines. Install the unit on a stable, level surface and keep it away from flammable materials. Avoid exposing the unit to direct sunlight or moisture. Never insert objects into the vents or grilles, as this can cause damage or electrical hazards. Ensure children and pets are kept away from the appliance while it is in operation. Regular maintenance and inspections are crucial to prevent malfunctions. Always unplug the unit before cleaning or servicing to avoid electric shock. Proper ventilation is essential to prevent carbon monoxide buildup. Follow all instructions in the manual to maintain safety and efficiency.

5.2. Electrical Safety Tips

For the LG LP0817WSR, ensure proper electrical installation by using a grounded outlet with the correct voltage rating. Avoid using extension cords or overloaded circuits. Keep the power cord away from water and heat sources to prevent damage or electrical hazards. Never operate the unit with a damaged cord or plug. Turn off the power before cleaning or servicing. Ensure all electrical connections are secure and follow local electrical safety standards to minimize risks of shock or fire. Regularly inspect cords and plugs for wear.

Maintenance and Troubleshooting

Regularly clean the LG LP0817WSR air filter and drain to ensure optimal performance. Check for blockages and tighten loose connections. Refer to the manual for troubleshooting common issues like low airflow or noise, and reset the unit if necessary. Schedule professional servicing annually to maintain efficiency and warranty validity. Always follow safety guidelines during maintenance to avoid damage or hazards.

6.1. Regular Maintenance Tips

To maintain the LG LP0817WSR, clean the air filter monthly and drain excess water regularly. Check for dust buildup and ensure proper ventilation. Inspect the power cord and connections for damage. Empty the water tank after each use to prevent mold growth. Wipe the exterior with a damp cloth to keep it clean. Replace the filter every three months or as needed. Ensure the unit is on a level surface for stable operation. Refer to the manual for detailed maintenance instructions to prolong the unit’s lifespan and performance. Always unplug the unit before servicing to ensure safety.

6.2. Common Issues and Solutions

Common issues with the LG LP0817WSR include error codes, water leakage, or reduced cooling performance. If the unit displays an error code, refer to the manual for specific solutions. Water leakage can be resolved by ensuring the drain is clear and properly connected. For reduced cooling, check if the air filter is clean and the room is well-insulated. If the unit is noisy, ensure it is installed on a level surface. Resetting the unit by unplugging and replugging it often resolves minor issues. Always consult the manual for detailed troubleshooting guidance.

Energy Efficiency and Tips

The LG LP0817WSR is designed with energy-saving features to minimize power consumption. Use the built-in timer and eco-mode for optimal efficiency, reducing energy costs effectively always.

7.1. Energy-Saving Features

The LG LP0817WSR incorporates advanced energy-saving technologies such as an eco-mode and a 24-hour timer. These features help reduce power consumption by optimizing operation based on the set schedule. Additionally, the unit’s automatic mode adjusts cooling output to maintain a consistent temperature, further enhancing efficiency. By utilizing these features, users can significantly lower their energy usage while maintaining comfort. The design ensures minimal energy waste, making it an eco-friendly choice for home cooling needs. Always refer to the manual for detailed settings guidance.

7.2. Optimizing Energy Consumption

To optimize energy consumption with the LG LP0817WSR, set the temperature between 70-75°F for efficient cooling. Use the 24-hour timer to schedule operation, avoiding unnecessary runtime. Regularly clean the air filter to maintain airflow and efficiency. Ensure proper insulation in the room to reduce cooling demands. Consider upgrading to a smart plug for remote monitoring and advanced scheduling. These practices help minimize energy usage while maintaining comfort, aligning with the unit’s eco-friendly design.

Noise Reduction Features

The LG LP0817WSR boasts advanced noise reduction technologies, including WhisperQuiet operation and sound-dampening compressor insulation, ensuring ultra-quiet performance ideal for home environments.

8.1. WhisperQuiet Technology

The WhisperQuiet Technology in the LG LP0817WSR minimizes noise levels to 45 dB, ensuring a peaceful environment. This advanced feature uses sound-dampening materials and optimized fan designs to reduce operational noise significantly. It is particularly beneficial in bedrooms or living areas where quiet operation is essential. By integrating this technology, the unit maintains high performance while keeping noise levels remarkably low, making it suitable for daily use without causing disturbances. This feature enhances user comfort and overall satisfaction with the product.

8.2. Night Mode Operation

The Night Mode Operation on the LG LP0817WSR automatically adjusts settings for quieter operation and energy efficiency during nighttime. This mode reduces fan speed and minimizes noise, ensuring uninterrupted sleep. It also optimizes temperature control, maintaining a comfortable environment while saving energy. The Night Mode is activated via the remote control, making it convenient to enable before bed. This feature is ideal for homeowners seeking a balance between performance and peace during the night. It enhances overall user experience by prioritizing comfort and efficiency.

Warranty and Customer Support

The LG LP0817WSR comes with a comprehensive warranty and dedicated customer support. Users can access assistance through LG’s official website or contact their support team directly.

9.1. Warranty Details

The LG LP0817WSR offers a comprehensive warranty package, ensuring customer satisfaction. The unit typically includes a one-year limited warranty covering parts and labor, and a five-year warranty for the compressor. Additional coverage may be available through extended warranty programs. For specific terms and conditions, users should refer to the official LG website or contact their customer service team. Proper registration and maintenance are recommended to uphold warranty validity and ensure optimal performance.

9.2. Contacting LG Customer Service

For assistance with the LG LP0817WSR, customers can contact LG Customer Service through multiple channels. The official LG website provides a contact form, phone numbers, and live chat options. Support is available 24/7 for inquiries, troubleshooting, or warranty-related issues. Users can also reach out via email or visit authorized service centers for in-person support. Ensure to have the product serial number ready for faster assistance. LG’s dedicated team is committed to resolving queries efficiently and ensuring a smooth user experience.

The LG LP0817WSR offers efficient cooling, quiet operation, and user-friendly controls, making it a reliable choice for home or office use.

10.1. Final Thoughts on LG LP0817WSR

The LG LP0817WSR is a highly efficient and reliable portable air conditioner, offering advanced features like WhisperQuiet Technology for minimal noise and a remote control for convenient operation. Its compact design and energy-saving capabilities make it ideal for small to medium-sized spaces. With a focus on user comfort and performance, this unit is a practical choice for anyone seeking a quiet and effective cooling solution. Its overall design and functionality ensure a satisfying experience for users.

bosch fpd 7024 manual

The Bosch FPD-7024 Fire Alarm Control Panel is a cutting-edge, IP-ready solution designed for commercial and public buildings, offering advanced fire safety management with an intuitive alphanumeric keypad and LCD display.

1.1 Overview of the Device and Its Purpose

The Bosch FPD-7024 is an IP-ready fire alarm control panel designed for commercial and public buildings, such as schools and universities. It provides advanced fire detection and notification solutions, ensuring reliable protection. The device features an alphanumeric keypad, LCD display, and compatibility with the Conettix DX4020 Ethernet module for network integration. It complies with UL and EN standards, making it a robust choice for fire safety management in various applications.

1.2 Key Features and Benefits

The Bosch FPD-7024 offers IP-readiness, enabling seamless network integration via the Conettix DX4020 Ethernet module. It features an intuitive alphanumeric keypad and a two-line, 16-character LCD display for easy operation. The panel supports advanced fire detection and notification systems, ensuring reliable protection. Its compatibility with UL and EN standards guarantees compliance with global fire safety regulations. Customizable programming options and scalability make it ideal for various commercial applications, providing enhanced security and flexibility for fire safety management.

Installation Guidelines for the Bosch FPD-7024

The Bosch FPD-7024 requires careful pre-installation planning and configuration, ensuring proper connection to the multiplex bus and power supply for optimal functionality in commercial environments.

2.1 Pre-Installation Requirements and Checklist

Before installing the Bosch FPD-7024, ensure the device is compatible with the building’s infrastructure and power supply. Verify the panel’s firmware version and update if necessary. Check the packaging for all included components, such as the control panel, keypad, and wiring harness. Ensure the installation site is prepared, with proper mounting surfaces and environmental conditions within specifications. Review local fire safety codes and regulations to ensure compliance. Have the necessary tools and documentation, including the installation manual, readily available.

  • Confirm power supply compatibility.
  • Inspect all components for damage.
  • Prepare the mounting location.
  • Ensure network and multiplex bus readiness.

2.2 Step-by-Step Installation Process

Begin by unpacking and inspecting all components for damage. Mount the control panel securely on a flat surface, ensuring proper grounding. Connect the wiring harness to the panel, following the provided wiring diagram. Install the keypad and any additional modules, such as the Conettix DX4020 Ethernet module. Power up the system and perform a self-test to verify functionality. Configure the system settings, including IP addressing if required. Test all zones and devices to ensure proper operation. Finally, review the installation for compliance with safety standards and complete any necessary documentation.

  1. Mount the control panel securely.
  2. Connect wiring and modules carefully.
  3. Power up and run system tests.
  4. Configure settings and test all zones.

2.3 Connecting to the Multiplex Bus and Power Supply

Connect the FPD-7024 to the multiplex bus for seamless communication with other system components. Ensure the power supply is securely attached to the panel and grounded properly. Refer to the wiring diagram for correct connections. Verify that the system meets FCC compliance standards to avoid interference. Power up the system and test all connections to ensure proper functionality.

  • Connect to the multiplex bus for component communication.
  • Securely attach the power supply and ensure grounding.
  • Verify FCC compliance to prevent interference.
  • Test all connections for proper system operation.

Operating the Bosch FPD-7024 Control Panel

Operate the FPD-7024 using the alphanumeric keypad and LCD display for intuitive navigation. Perform day-to-day functions like arming/disarming, viewing system status, and managing alarms efficiently.

3.1 Understanding the Built-in Alphanumeric Keypad

The Bosch FPD-7024 features an alphanumeric LCD keypad with a two-line, 16-character display. This interface provides real-time system status on the top line and user input or menu options on the bottom. Clearly labeled keys facilitate easy navigation and function execution. The keypad is essential for tasks like arming/disarming the system and configuring settings. A factory-default Programmer PIN, typically 9876, is required for advanced configurations, ensuring secure access to system programming and maintaining security.

3.2 Navigating the LCD Display and Basic Functions

The Bosch FPD-7024’s LCD display provides real-time system status updates, with the top line showing current conditions and the bottom line for user input or menu prompts. The interface is intuitive, allowing users to monitor fire alarm systems, acknowledge alarms, and perform basic functions like silencing notifications or accessing event logs. The display’s clarity ensures quick understanding of system operations, making it user-friendly for both technicians and end-users. This feature is central to efficient day-to-day monitoring and control of the fire safety system.

3.3 Day-to-Day Operations and Monitoring

The Bosch FPD-7024 enables seamless day-to-day monitoring and operations through its intuitive interface. Users can easily acknowledge alarms, silence notifications, and perform routine system checks. The panel provides real-time status updates, ensuring quick response to emergencies. Event logs are accessible for reviewing historical data, aiding in maintenance and troubleshooting. Custom programming options allow for tailored monitoring, ensuring the system meets specific site requirements. Regular checks and updates ensure optimal performance, making it a reliable solution for fire safety management.

Advanced Features of the Bosch FPD-7024

The Bosch FPD-7024 offers IP-readiness, Ethernet integration via the Conettix DX4020 module, and custom programming options, ensuring enhanced functionality and adaptability for advanced fire safety systems.

4.1 IP-Readiness and Network Integration

The Bosch FPD-7024 is IP-ready, enabling seamless integration with Ethernet networks through the Conettix DX4020 module. This allows for two-way communication over IP networks, ensuring real-time monitoring and control. The system supports remote access, diagnostics, and monitoring via Bosch’s software solutions. Network integration enhances scalability and flexibility, making it ideal for large-scale applications. The module ensures secure and reliable communication, with features like encryption and secure authentication. This capability streamlines system management and enhances overall fire safety capabilities.

4.2 Compatibility with Conettix DX4020 Ethernet Module

The Bosch FPD-7024 is fully compatible with the Conettix DX4020 Ethernet Module, enabling seamless network integration; This module connects to the control panel’s multiplex bus, providing two-way communication over Ethernet networks. It supports remote monitoring, diagnostics, and control, enhancing system scalability. Designed for Bosch fire alarm systems, the DX4020 module ensures reliable and secure communication, making it ideal for commercial and public buildings requiring advanced fire safety solutions.

4.3 Custom Programming and Configuration Options

The Bosch FPD-7024 offers extensive custom programming and configuration options, allowing tailored fire safety solutions. The control panel supports personalized settings for zones, devices, and response behaviors. A default Programmer PIN (9876) enables secure access to configuration modes, which can be modified for enhanced security. Custom programming ensures adaptability to specific building needs, providing a flexible and scalable fire safety system. This feature-rich design makes the FPD-7024 ideal for diverse commercial and public applications.

Compliance and Safety Standards

The Bosch FPD-7024 adheres to rigorous safety and compliance standards, ensuring reliability and adherence to fire safety regulations for secure and effective fire protection systems.

5;1 FCC Compliance Notice and Regulations

The Bosch FPD-7024 complies with FCC regulations as a Class A digital device under Part 15 of the FCC Rules. It was tested and found to meet the specified limits, ensuring minimal radio interference. Users must follow the provided instructions to avoid unauthorized modifications, which could void compliance. This certification guarantees safe and reliable operation within U.S. regulatory standards for electronic devices.

5.2 UL and EN Standards for Fire Safety

The Bosch FPD-7024 Fire Alarm Control Panel complies with UL and EN standards for fire safety, ensuring reliability and adherence to international safety norms. Designed for commercial and public buildings, it meets strict requirements for fire protection systems. The device undergoes rigorous testing to ensure compliance with these standards, providing users with a trusted solution for fire safety. Detailed documentation on UL and EN certifications is available in the product’s manual for verification.

Troubleshooting and Maintenance

The Bosch FPD-7024 manual provides detailed troubleshooting steps and maintenance schedules to ensure optimal performance. Regular inspections and addressing common issues promptly are essential for reliability.

6.1 Common Issues and Solutions

The Bosch FPD-7024 manual outlines common issues such as error codes, detector cleaning needs, and network connectivity problems. Solutions include checking wiring connections, cleaning smoke detectors, and restarting the system. Regular maintenance, like dusting sensors and updating software, prevents issues. For persistent problems, consult the troubleshooting guide or contact Bosch support for expert assistance. Always refer to the manual for detailed diagnostic steps and repair procedures to ensure system reliability and compliance with safety standards.

6.2 Regular Maintenance and Inspection Requirements

Regular maintenance of the Bosch FPD-7024 ensures optimal performance and reliability. Inspect the control panel, sensors, and wiring monthly for damage or dust buildup. Clean smoke detectors and ensure proper airflow. Test alarm functions quarterly and verify network connectivity. Replace batteries as needed and update software to the latest version. Detailed maintenance schedules and procedures are outlined in the manual to meet UL and EN standards, ensuring compliance and system readiness for emergencies.

Accessing the Bosch FPD-7024 Manual and Resources

The Bosch FPD-7024 manual is available online as a free PDF download, providing detailed installation, operation, and programming instructions. Additional resources, including datasheets and guides, are accessible on the official Bosch website for comprehensive support.

7;1 Downloading the PDF Manual Online

The Bosch FPD-7024 manual is readily available for download in PDF format from the official Bosch Security Systems website. The 122-page document provides detailed instructions for installation, operation, and troubleshooting. Users can access it without registration by visiting the product page and selecting the appropriate resources section. The manual is titled “Bosch FPD-7024 Operation and Installation Manual” and is free to download, ensuring easy access for professionals and technicians needing comprehensive guidance.

7.2 Additional Documentation and Guides

Beyond the main manual, additional resources like datasheets, installation guides, and programming manuals are available for the Bosch FPD-7024. These documents provide in-depth technical details, troubleshooting tips, and configuration options. The datasheet offers specifications and compatibility information, while programming guides assist technicians in customizing the system. All materials are accessible via Bosch’s official website or through their product support page, ensuring comprehensive support for installers and maintenance professionals.

kenmore sewing machine manuals free download

Kenmore sewing machine manuals are essential for understanding machine operation, maintenance, and troubleshooting. They provide detailed guidance for models like the 158.18030, ensuring optimal performance and safety.

1.1 Importance of Having a Kenmore Sewing Machine Manual

A Kenmore sewing machine manual is crucial for optimal machine performance and safety. It provides detailed instructions for threading, maintenance, and troubleshooting, ensuring users can address common issues like improper stitching or jamming. Without a manual, understanding the machine’s features and proper care techniques can be challenging. Manuals also include safety precautions to prevent accidents and extend the machine’s lifespan. For vintage models, such as the Kenmore 158.18030, manuals are indispensable for restoring and operating the machine effectively. They often include diagrams and step-by-step guides, making them a vital resource for both beginners and experienced sewists. Accessing a free download ensures users can easily reference these essential instructions whenever needed.

Where to Find Free Kenmore Sewing Machine Manuals

Free Kenmore sewing machine manuals can be found on Sears Parts Direct and ManualsLib. These platforms offer downloadable PDFs for models like the Kenmore Model 385.

2.1 Sears Parts Direct as a Reliable Source

Sears Parts Direct is a trusted platform for accessing free Kenmore sewing machine manuals. It offers downloadable PDFs for various models, including vintage ones like the Kenmore Model 158.18030. Users can easily search by model number, ensuring they find the exact manual they need. The platform is particularly useful for those who have lost their original manuals or purchased a second-hand machine. Manuals available on Sears Parts Direct include detailed instructions for operation, maintenance, and troubleshooting. This resource is invaluable for sewists seeking to understand their machine’s functions better. By providing free access to these guides, Sears Parts Direct helps users keep their Kenmore sewing machines in optimal condition. This convenience makes it a go-to destination for sewing enthusiasts.

2.2 Other Online Platforms Offering Free Downloads

Besides Sears Parts Direct, several other online platforms provide free Kenmore sewing machine manuals. Websites like ManualsLib and specific sewing communities offer downloadable PDFs for various Kenmore models. These platforms cater to both vintage and newer machines, ensuring users can access instructions regardless of their model’s age. Additionally, some forums and DIY sewing blogs share manuals uploaded by users, fostering a supportive community. Platforms like Etsy and eBay sometimes offer free or low-cost manual downloads, particularly for rare or discontinued models. These resources are invaluable for those seeking comprehensive guides without cost. By exploring these options, users can easily find and download the manuals they need to operate and maintain their Kenmore sewing machines effectively.

Popular Kenmore Sewing Machine Models and Their Manuals

Popular Kenmore models like the 158.18030 and 385 are well-documented with free manuals available online, offering detailed operation and maintenance guides for seamless sewing experiences.

3.1 Kenmore Model 158.18030 Manual Overview

The Kenmore Model 158.18030 manual is a comprehensive guide offering detailed instructions on threading, operation, and maintenance. It includes troubleshooting tips and safety precautions, ensuring users can resolve common issues and maintain their machine effectively. With its clear diagrams and step-by-step instructions, this manual is indispensable for both beginners and experienced sewists. It covers various stitching options, bobbin management, and essential care routines. Users can easily find this manual online, often available as a free PDF download, making it accessible for those who need to restore or optimize their machine’s performance. This resource is a must-have for anyone owning the Kenmore Model 158.18030 sewing machine.

3.2 Kenmore Model 385 Manual Details

The Kenmore Model 385 manual is a free PDF download available online, providing detailed operating instructions, maintenance tips, and troubleshooting advice. It covers essential features like stitching options, bobbin setup, and thread management; Users praise the manual for its clarity in explaining advanced functions and basic care routines. The guide includes diagrams to help with part identification and repair. Sears Parts Direct and ManualsLib are reliable sources for this manual. It is a valuable resource for anyone looking to restore or optimize their Kenmore Model 385 sewing machine, ensuring optimal performance and longevity. This manual is a must-have for both novice and experienced sewists.

What Kenmore Sewing Machine Manuals Typically Include

Kenmore manuals provide safety tips, maintenance routines, troubleshooting guides, and threading instructions, ensuring users can operate and care for their machines effectively.

4.1 Safety Instructions and Precautions

Kenmore sewing machine manuals emphasize essential safety measures to ensure safe operation. They include precautions like keeping children away, using the correct voltage, and avoiding loose clothing. Proper handling of needles and bobbins is also highlighted to prevent injuries. Users are advised to follow guidelines for electrical safety and avoid overloading the machine. These instructions help prevent accidents and prolong the machine’s lifespan. By adhering to these precautions, users can enjoy a safe and efficient sewing experience. The manuals are designed to guide both novice and experienced users, ensuring they understand and follow critical safety protocols. This section is vital for anyone looking to operate their Kenmore sewing machine responsibly and effectively.

4.2 Maintenance and Cleaning Guidelines

Kenmore sewing machine manuals provide detailed maintenance and cleaning instructions to ensure optimal performance. Regularly cleaning lint and dust from the machine is crucial for smooth operation. Oiling the mechanical parts, as specified in the manual, helps maintain functionality and prevents wear. Users are advised to inspect and replace worn or damaged components promptly. Additionally, the manuals often include tips for organizing cables and storing the machine properly when not in use. Following these guidelines extends the machine’s lifespan and ensures reliable sewing results. Proper maintenance also enhances safety by preventing mechanical failures during operation. By adhering to these care instructions, users can keep their Kenmore sewing machine in excellent working condition for years.

4.3 Troubleshooting Common Issues

Kenmore sewing machine manuals include troubleshooting sections to address common problems such as thread bunching, machine jamming, or uneven stitching. These guides often provide step-by-step solutions, like checking thread tension, ensuring proper needle alignment, or clearing debris from the bobbin area. For models like the Kenmore 158.18030 or 385, manuals may specify solutions for issues unique to those machines. Additionally, they highlight the importance of regular maintenance, such as oiling parts, to prevent mechanical failures. Users are encouraged to refer to the manual before attempting repairs, as improper fixes can worsen issues. By following these troubleshooting tips, users can resolve problems efficiently and extend their machine’s lifespan.

4.4 Threading and Basic Operation Guide

Kenmore sewing machine manuals provide detailed threading instructions, ensuring proper thread flow through the machine. They often include diagrams and step-by-step guides for both the upper and bobbin threads. For models like the Kenmore 158.18030, manuals specify how to correctly thread the machine to avoid tangles or breaks. Basic operation guides cover essential functions, such as selecting stitches, adjusting tension, and controlling sewing speed. These sections are designed to help users master fundamental skills, making sewing efficient and enjoyable. By following the manual’s guidance, users can achieve consistent stitching and optimal performance. Sears Parts Direct and other platforms offer these guides for free, ensuring easy access to threading and operation instructions.

Tips for Downloading and Using Kenmore Manuals

To download Kenmore manuals, use specific model numbers in searches and verify authenticity by cross-checking with trusted sources like Sears Parts Direct.

5.1 Effective Search Strategies for Manuals

To find Kenmore sewing machine manuals, use specific model numbers like “Kenmore 158.18030” or “Model 385” in your searches. Include keywords such as “manual,” “PDF,” or “free download” to refine results. Check trusted platforms like Sears Parts Direct or ManualsLib, which offer reliable downloads. For vintage models, forums and sewing communities often share links to rare manuals. Verify the authenticity of sources to ensure you’re downloading correct and safe files. Avoid generic searches and focus on exact model identifiers for better outcomes. This approach saves time and increases the likelihood of finding the manual you need.

5.2 Verifying the Authenticity of Downloaded Manuals

Verifying the authenticity of Kenmore sewing machine manuals ensures accuracy and safety. Cross-check the manual’s model number with your machine to confirm compatibility. Look for official branding from Kenmore or Sears, as genuine manuals typically include logos and specific formatting. Check file metadata for publication dates and copyright information. Be cautious of unofficial sources offering free downloads, as they may contain errors or malicious content. Compare instructions with trusted platforms like Sears Parts Direct or Kenmore’s official website to ensure consistency. If unsure, contact Kenmore customer support for validation. Authentic manuals are crucial for proper machine operation and troubleshooting. Always prioritize verified sources to avoid potential issues.

Additional Resources for Kenmore Sewing Machine Users

Beyond manuals, users can explore video tutorials and online forums for troubleshooting and creative tips, enhancing their sewing experience with Kenmore machines effectively.

6.1 Video Tutorials and Online Communities

Video tutorials and online communities offer invaluable support for Kenmore sewing machine users. Platforms like YouTube feature detailed guides for models such as the 158.18030, covering threading, maintenance, and troubleshooting. Online forums and groups dedicated to sewing enthusiasts provide a space to share experiences, ask questions, and access model-specific advice. These resources complement manual instructions, offering visual and interactive learning opportunities. Additionally, communities often share creative tips and solutions for common issues, enhancing the overall sewing experience. By engaging with these resources, users can gain a deeper understanding of their machines and stay connected with fellow sewers, fostering a supportive and knowledge-rich environment.

6.2 Contacting Kenmore Customer Support

For direct assistance with Kenmore sewing machine manuals or troubleshooting, contacting customer support is a reliable option. Users can visit the official Kenmore website to find contact information, including phone numbers, email forms, or live chat options. Sears Parts Direct, an authorized distributor, also provides support for Kenmore products, including manual downloads. Many users have successfully obtained free manuals through Sears Parts Direct, ensuring they receive authentic and detailed guides. Additionally, live chat support on the Kenmore website offers immediate assistance for queries related to machine operation or maintenance. Reaching out to customer support is a straightforward way to address specific needs or resolve issues not covered in user manuals.

Kenmore sewing machine manuals are readily available online, ensuring easy access to operation, maintenance, and troubleshooting guides, empowering users to maximize their machine’s potential effectively.

7.1 Final Thoughts on Accessing Kenmore Manuals

Accessing Kenmore sewing machine manuals is straightforward, with numerous free resources available online. Sears Parts Direct and ManualsLib are reliable sources for downloading PDF manuals, ensuring users can easily access guides for models like the Kenmore 158.18030 or 385. These manuals cover essential topics such as threading, maintenance, and troubleshooting. Additionally, video tutorials and online sewing communities provide further support for users seeking hands-on guidance. Always verify the authenticity of downloaded manuals to ensure accuracy. By utilizing these resources, users can optimize their sewing machine’s performance and extend its lifespan. Remember, proper usage and regular maintenance, as outlined in the manuals, are key to enjoying a seamless sewing experience.

fd60 u6 manual

The FD60-U6 Timer is a digital, dual-outlet device designed for 7-day programming, offering explosion-proof functionality and certifications like CCC, ISO9001, and CE for enhanced safety and reliability.

1.1 Overview of the FD60-U6 Model

The FD60-U6 Timer is a 7-day programmable digital timer designed for dual-outlet operation. It features an explosion-proof design and is certified under CCC, ISO9001, and CE standards. The timer offers manual override options and is suitable for heavy-duty applications. Its user-friendly interface allows for easy programming of ON, AUTO, and OFF modes. This versatile device is ideal for automating lights, appliances, and other equipment, ensuring convenience and energy efficiency.

1.2 Key Features and Functionalities

The FD60-U6 Timer offers a range of features, including 7-day programmable scheduling, manual override capabilities, and a backlit LCD screen for easy navigation. It supports dual-outlet control, allowing independent management of two devices. The timer also includes a current day and time display, program scheduling options, and automation features for ON, AUTO, and OFF modes. These functionalities make it ideal for managing lights, appliances, and other equipment with precision and convenience.

Technical Specifications of the FD60-U6

The FD60-U6 is a dual-outlet timer with explosion-proof design, rated for 125V and 60Hz. It features mechanical operation, CCC, ISO9001, and CE certifications, ensuring safe and reliable performance.

2.1 Product Certifications (CCC, ISO9001, CE)

The FD60-U6 Timer holds certifications like CCC, ISO9001, and CE, ensuring compliance with international quality and safety standards. These certifications verify the product’s reliability, durability, and adherence to safety protocols. CCC certification confirms compliance with Chinese safety standards, while ISO9001 ensures quality management. CE marking indicates conformity with European health, safety, and environmental regulations, making the FD60-U6 suitable for diverse applications and ensuring user trust in its performance and safety.

2.2 Mechanical and Electrical Details

The FD60-U6 Timer features a robust mechanical design with dual outlets, supporting heavy-duty applications. It operates at 125V and 60Hz, ensuring reliable performance in various environments. The timer’s explosion-proof construction enhances durability and safety, making it suitable for both indoor and outdoor use. Its mechanical operation ensures precise control over connected devices, while the electrical design maintains stability and efficiency, catering to diverse operational needs without compromising on performance or longevity.

Safety and Compliance Standards

The FD60-U6 Timer adheres to rigorous safety and compliance standards, featuring CCC, ISO9001, and CE certifications, and incorporates an explosion-proof design for enhanced protection in hazardous environments.

3.1 Explosion-Proof Design and Ratings

The FD60-U6 Timer features an explosion-proof design, ensuring safe operation in hazardous environments. Its ratings and certifications, including CCC, ISO9001, and CE, confirm its reliability. The dual-outlet mechanism is built to withstand harsh conditions, making it ideal for industrial and outdoor use while maintaining compliance with global safety standards. This design ensures optimal performance and durability in demanding settings, providing users with a secure and efficient timing solution.

3.2 Compliance with International Safety Standards

The FD60-U6 Timer adheres to rigorous international safety standards, including CCC, ISO9001, and CE certifications. These certifications ensure the device meets global safety and quality benchmarks. Designed for durability, it operates reliably in harsh environments, making it suitable for industrial and outdoor applications. Compliance with these standards guarantees user safety and product reliability, aligning with worldwide regulations and providing a trustworthy solution for automated timing needs.

Installation and Setup Guide

The FD60-U6 Timer is designed for easy installation and setup. Mount the device securely, connect the power, and follow the step-by-step guide for initial configuration to ensure proper operation.

4.1 Step-by-Step Installation Instructions

Mount the FD60-U6 Timer securely on a flat surface, ensuring stability. Connect the power supply carefully, following the wiring diagram in the manual. Set the current day and time by pressing the CLOCK button, then navigate using the HOUR and MINUTE buttons. Configure the desired programs by pressing the PROG button and selecting ON/AUTO/OFF modes; Ensure all connections are secure and test the timer to confirm proper operation before regular use.

4.2 Initial Configuration and Setup

Begin by setting the current day and time using the CLOCK, HOUR, and MINUTE buttons. Press the PROG button to enter programming mode and configure your desired schedules. Select ON, AUTO, or OFF modes as needed. Use the MANUAL override option to temporarily adjust settings. Ensure the timer is in AUTO mode for automated operation. Refer to the manual for detailed setup steps and confirm all configurations before enabling the timer for regular use.

Programming the FD60-U6 Timer

Program the timer by setting schedules, automating operations, and using manual override. It supports 7-day programming, enabling customizable on/off cycles and seamless automation for various applications.

5.1 Setting the Current Day and Time

To begin programming, set the current day and time accurately. Press the PROG button, then use the arrow keys to adjust the day, hour, and minute. Confirm the settings to ensure the timer operates on the correct schedule. The display will show the updated time, allowing you to proceed with programming. Ensure the time is set correctly for schedules to function properly. This step is essential for all automated operations.

5.2 Creating and Editing Programs

To create a program, press the PROG button and use the arrow keys to select the desired day and time. Choose the ON/AUTO/OFF mode and set your preferred schedule. To edit, navigate to the existing program, adjust the settings, and press SET to save changes. Ensure all events are correctly programmed for reliable operation. This feature allows customization of your timer to meet specific needs, enhancing automation efficiency in various applications. Proper setup ensures smooth functionality.

5.3 Understanding Manual Override Options

The FD60-U6 Timer offers manual override functionality, allowing users to temporarily bypass programmed schedules. Press the ON/AUTO/OFF button to switch modes: ON activates the timer, AUTO runs scheduled programs, and OFF deactivates it. Manual override is useful for quick adjustments without altering saved settings. This feature provides flexibility for unexpected changes or testing configurations. Ensure the timer is in AUTO mode for scheduled operations to function correctly. Manual control is ideal for temporary overrides or troubleshooting purposes.

Operating Instructions and Modes

The FD60-U6 Timer operates in ON, AUTO, and OFF modes, allowing users to manually control devices or automate schedules. AUTO mode follows programmed settings, while ON and OFF provide immediate control. This versatility ensures seamless operation for various applications, making it ideal for both manual and automated control scenarios. The intuitive design simplifies switching between modes to suit different needs. Additionally, the timer supports scheduling options for enhanced automation and convenience. Users can easily toggle between modes using the ON/AUTO/OFF button, ensuring flexibility in device management. The 7-day programming capability further enhances its functionality for consistent and reliable operation. This feature-rich design makes the FD60-U6 a versatile solution for diverse control requirements. By understanding these modes, users can optimize their timer usage for efficiency and convenience. The combination of manual and automated controls ensures that the FD60-U6 adapts to any operational need seamlessly.

6.1 Understanding ON, AUTO, and OFF Modes

The FD60-U6 Timer features three primary operating modes: ON, AUTO, and OFF. ON mode keeps the device active until manually turned off, while OFF deactivates it entirely. AUTO mode follows a programmed schedule, enabling automated control. Users can switch between these modes using the ON/AUTO/OFF button, allowing for flexible control of connected devices. This versatility ensures the timer can adapt to various applications, providing both manual and automated functionality as needed. The modes are designed for ease of use, making it simple to manage devices according to specific requirements or schedules.

6.2 Scheduling Options and Automation Features

The FD60-U6 Timer offers advanced scheduling options, allowing users to set up to 20 on/off events daily. Its 7-day programming capability ensures customized control over connected devices. Automation features include a real-time clock and programmable schedules, eliminating the need for manual intervention. The timer also supports random start times to simulate occupancy, enhancing security and energy efficiency. These features make it ideal for automating lights, appliances, and other devices with precision and flexibility.

Troubleshooting Common Issues

Common issues include incorrect programming or power failures. Resetting the timer to factory settings often resolves malfunctions. Refer to the manual for detailed diagnostic steps and solutions.

7.1 Diagnosing and Resolving Timer Malfunctions

Identify symptoms like incorrect timing or display malfunctions. Consult the manual for troubleshooting steps. Check for loose connections or power issues. Resetting the timer to factory settings often resolves issues. For programming errors, reprogram the device carefully. If the timer fails to turn devices on/off, ensure it is in AUTO mode. Addressing these common issues promptly ensures reliable operation. Regular maintenance and updates can prevent future malfunctions.

7.2 Resetting the Timer to Factory Settings

To reset the FD60-U6 Timer to factory settings, press and hold the reset button located on the back or side of the device for 5-10 seconds. This will erase all programmed settings, returning the timer to its default state. After resetting, the timer will display the initial setup screen. You will need to reprogram the current day, time, and any desired schedules. Ensure the device is powered on during the reset process for it to take effect properly.

Maintenance and Care Tips

Regularly clean the FD60-U6 Timer with a soft cloth to prevent dust buildup. Avoid exposing it to moisture or extreme temperatures to ensure optimal performance and longevity.

8.1 Best Practices for Longevity

For optimal longevity, clean the FD60-U6 Timer regularly with a soft cloth to prevent dust accumulation. Avoid exposing the device to moisture or extreme temperatures, as this can damage internal components. Store the timer in a dry, cool environment when not in use. Additionally, ensure proper ventilation around the device to prevent overheating. Following these practices will help maintain its performance and extend its lifespan effectively.

8.2 Cleaning and Environmental Considerations

Regularly clean the FD60-U6 Timer with a soft, dry cloth to remove dust and debris. Avoid using harsh chemicals or abrasive materials, as they may damage the device. Ensure the timer is unplugged before cleaning. Store it in a cool, dry environment to prevent moisture exposure. Proper ventilation is essential to avoid overheating. By maintaining these environmental practices, you can ensure the timer operates efficiently and safely over time.

The FD60-U6 Timer offers exceptional reliability, ease of use, and safety, making it a versatile solution for automation needs in both residential and industrial settings effectively.

9.1 Summary of Key Features and Benefits

The FD60-U6 Timer is a dual-outlet, 7-day programmable device offering precise automation for various appliances. Its explosion-proof design ensures safe operation in hazardous environments. Certified by CCC, ISO9001, and CE, it guarantees reliability and compliance with international standards. The timer’s user-friendly interface allows easy scheduling and manual overrides, providing convenience and flexibility for both residential and industrial applications. Its durability and energy-efficient features make it a cost-effective solution for automating tasks seamlessly.

9.2 Final Tips for Optimal Use

Regularly clean the FD60-U6 to prevent dust buildup and ensure reliable operation. Install it in a well-ventilated area to avoid overheating. Periodically review and update programmed schedules to adapt to changing needs. For optimal performance, refer to the user manual for any software updates or new features. Proper maintenance ensures longevity and consistent functionality.

Additional Resources

Visit the official website for FD60-U6 manuals, user guides, and video tutorials to explore advanced features and troubleshooting tips for optimal device utilization and maintenance.

10.1 Links to Official Manuals and Guides

Access the official FD60-U6 manual and user guides on the manufacturer’s website for detailed instructions on programming, safety, and troubleshooting. Additionally, find video tutorials and specification sheets to enhance your understanding of the timer’s features and operation. These resources provide comprehensive support for setup, maintenance, and optimal use of the FD60-U6 timer, ensuring you maximize its functionality and longevity.

10.2 Recommended Videos and Tutorials

For visual learners, the official BN-LINK YouTube channel offers an excellent FD60-U6 setup and programming tutorial. This comprehensive video guide walks users through step-by-step installation, scheduling, and troubleshooting. Additionally, tutorials on platforms like YouTube provide hands-on demonstrations of the timer’s features, such as manual override and automation settings. These resources are ideal for both new and experienced users seeking to maximize the timer’s functionality and streamline their automation processes efficiently.

jlg manlift manual

The JLG Manlift Manual is a comprehensive guide for operating, maintaining, and troubleshooting JLG aerial lifts. It ensures safety, efficiency, and compliance with industry standards, providing essential information for owners and operators.

Safety Precautions and Guidelines

Adhere to ANSI standards, ensure proper training, and conduct regular equipment inspections. Always wear harnesses and follow emergency procedures. Compliance with safety guidelines ensures operator well-being and prevents accidents during operation.

Pre-Operation Checks

Before operating the JLG manlift, perform a thorough pre-operation check to ensure all systems are functioning properly. Inspect the boom, platform, and controls for any damage or wear. Check hydraulic fluid levels, tire pressure, and battery condition. Verify that all safety devices, such as emergency stops and alarms, are operational. Ensure proper function of the foot pedal and control panel. Look for any error codes or warnings on the display screen and address them immediately. Test all movement functions, including elevation and rotation, to ensure smooth operation. Always refer to the manual for specific guidelines and procedures. A pre-operation checklist is provided in the manual to help operators systematically verify each component. Completing these checks helps prevent accidents and ensures a safe working environment. Regular maintenance and inspections are crucial for optimal performance and longevity of the equipment.

Emergency Procedures

In case of an emergency, follow the procedures outlined in the JLG Manlift Manual to ensure operator and bystander safety. If the machine becomes stuck or inoperable, activate the emergency stop button to halt all functions. For aerial lifts, lower the platform to the ground using the emergency descent procedure if possible. If unable to lower manually, contact authorized JLG service personnel immediately. In situations where error codes appear, refer to the troubleshooting section to identify the issue. Never attempt to override safety mechanisms or bypass systems without proper authorization. If the machine experiences a hydraulic or mechanical failure, evacuate the area and secure it to prevent accidents. Always maintain communication with coworkers and supervisors during emergencies. Keep the emergency contact information handy, including the JLG support hotline. Remember, safety is the top priority, and improper handling of emergencies can lead to further risks. Always follow the manual’s guidance and seek professional assistance when needed.

Maintenance and Inspection Procedures

Regular maintenance and inspections are crucial for ensuring the safe and efficient operation of JLG manlifts. Follow the manual’s guidelines for daily, weekly, and periodic checks, including hydraulic systems, wire ropes, and control panels.

Daily Maintenance Checks

Daily maintenance checks are essential to ensure the JLG manlift operates safely and efficiently. Begin by inspecting the machine’s overall condition, checking for any visible damage or wear. Examine the hydraulic fluid levels and top them off as needed. Look for any leaks in hydraulic lines or cylinders. Next, test the control functions, ensuring all joystick movements and switch operations respond correctly. Inspect the wire ropes and chains for signs of fraying or rust; Check the tire pressure and ensure proper tread depth if the machine is equipped with wheels. Verify that all safety devices, such as emergency stops and alarms, are functioning properly. Finally, review the operator’s manual for any specific daily checks recommended by JLG. Keeping a log of these inspections can help track maintenance and ensure compliance with safety standards.

Weekly Maintenance Procedures

Weekly maintenance is crucial for ensuring the longevity and reliable operation of your JLG manlift. Start by lubricating all moving parts, such as pivot pins and bushings, to reduce wear and tear. Inspect the hydraulic system for any signs of leaks or contamination, and replace hydraulic filters as recommended by the manufacturer. Check the condition of wire ropes and chains, looking for any signs of excessive wear or damage. Clean the control panel and ensure all buttons and switches are functioning properly. Test the emergency stop system to confirm it works as intended. Review the error codes on the control panel and address any issues promptly. Finally, inspect the battery terminals for corrosion and ensure the battery is fully charged. By following these weekly procedures, you can help prevent unexpected downtime and ensure the manlift operates safely and efficiently. Always refer to the JLG manual for specific recommendations tailored to your model.

Troubleshooting Common Issues

Identify common issues like error codes, hydraulic malfunctions, or control panel problems. Check the manual for solutions, perform systematic checks, and consult professionals for complex repairs to ensure safe and efficient operation.

Understanding Error Codes

Error codes are critical for diagnosing issues in JLG manlifts. Codes like “Error 52” indicate hydraulic pressure problems, while “Error 34” points to sensor malfunctions. Refer to the manual for specific code meanings and solutions. Always record the code and the circumstances under which it occurred. This helps technicians identify the root cause quickly. Some codes may require immediate action, such as shutting down the machine for safety. Others may allow continued operation under specific conditions. Never ignore error codes, as they can signal serious underlying issues. If unsure, consult the troubleshooting guide or contact JLG support. Regularly updating software and performing maintenance can prevent recurring error codes. Keep a log of resolved codes for future reference and to track machine performance over time.

Operating Instructions

Operating a JLG manlift requires careful adherence to the manual’s guidelines. Begin by ensuring all pre-operation checks are completed, including hydraulic fluid levels and control functionality. Always wear the provided safety harness and ensure the platform is level before elevating. Use the control panel to raise or lower the boom, and never exceed the load capacity. For models like the 1100SB, refer to the specific ANSI standards outlined in the manual. If issues arise, such as the “foot pedal and CAN bus” error, consult the troubleshooting section or contact JLG support. Keep the manual accessible for quick reference, especially for procedures like emergency descent or resetting error codes. Regularly update software and perform routine maintenance to ensure optimal performance. Familiarize yourself with the control layout and practice operating the manlift in a safe, open area before workplace use. Always follow the manufacturer’s instructions to ensure safe and efficient operation.

Accessing JLG Manuals Online

Accessing JLG manuals online is a convenient way to obtain essential information for your aerial lift. Visit the official JLG website or authorized platforms to view, download, or print the manuals. Models like the 1100SB and others are readily available, ensuring you have the most current safety and operational guidelines. Many manuals are free to access after creating an account or verifying ownership. Use the search function to find specific models or serial numbers. Downloaded manuals can be saved for offline use, ensuring accessibility even without internet. This feature is particularly useful for troubleshooting or maintenance tasks. Always verify the source to ensure authenticity and accuracy. By accessing manuals online, you can stay updated with the latest safety protocols and operational procedures. This resource is invaluable for owners, operators, and technicians, providing immediate access to critical information whenever needed. Regularly check for updates to maintain compliance with industry standards.

2011 honda pilot owners manual

The 2011 Honda Pilot Owners Manual is a comprehensive guide designed to help you understand and optimize your vehicle’s features‚ maintenance‚ and operation. It covers essential information on safety‚ technical specifications‚ and troubleshooting‚ ensuring a smooth and enjoyable driving experience. This manual is a valuable resource for both new and experienced owners‚ providing detailed insights to maximize your vehicle’s performance and longevity. By following the guidelines outlined‚ you can ensure proper care and maintenance‚ preventing potential issues and enhancing overall satisfaction with your 2011 Honda Pilot.

1.1 Importance of the Manual

The 2011 Honda Pilot Owners Manual is a crucial resource for understanding your vehicle’s features‚ maintenance needs‚ and troubleshooting. It provides essential information to ensure safe and efficient operation‚ helping you maximize performance and longevity. By referencing the manual‚ you can identify potential issues early‚ reducing repair costs and extending your vehicle’s life. It serves as a comprehensive guide for both new and experienced drivers‚ offering clear instructions for optimal vehicle care. Keeping the manual handy ensures you have quick access to vital information‚ empowering you to make informed decisions about your 2011 Honda Pilot.

1.2 How to Navigate the Manual

The 2011 Honda Pilot Owners Manual is organized into clear sections‚ making it easy to locate specific information. Start with the table of contents for a quick overview of topics like maintenance‚ features‚ and troubleshooting. Use the index to find detailed explanations of specific components or procedures. Visual guides and diagrams are included to help you understand complex systems. Each section is designed to provide straightforward instructions‚ ensuring you can efficiently navigate and utilize the manual’s resources. This logical structure allows you to access the information you need quickly and effortlessly.

Features and Controls of the 2011 Honda Pilot

The 2011 Honda Pilot offers a range of features designed for comfort and functionality. Interior highlights include ample seating‚ versatile storage solutions‚ and advanced technology. Exterior features provide durability and practicality‚ while user-friendly controls ensure easy operation of audio‚ climate‚ and navigation systems. The instrument panel displays essential driver information‚ making it easy to monitor your vehicle’s performance and settings.

2.1 Interior Features

The 2011 Honda Pilot boasts a spacious and well-equipped interior designed for comfort and versatility. Seating up to eight passengers‚ it offers ample legroom and adjustable seats for optimal comfort. Interior storage solutions include cargo compartments‚ cup holders‚ and a convenient center console. The audio system features a high-quality sound system with USB connectivity‚ while Bluetooth HandsFreeLink allows for safe and hands-free phone operation. Additional features like tri-zone automatic climate control and a multi-information display enhance the driving experience‚ ensuring convenience and satisfaction for all occupants.

2.2 Exterior Features

The 2011 Honda Pilot features a robust and functional exterior design. Alloy wheels enhance both durability and style‚ while fog lights improve visibility in challenging conditions. Roof rails provide ample space for luggage or equipment‚ and a rearview camera aids in safe parking maneuvers. The aerodynamic profile optimizes performance and fuel efficiency. Privacy glass on the rear windows adds style and reduces glare‚ ensuring a comfortable driving experience. These features collectively enhance the Pilot’s practicality and appeal.

2.3 Instrument Panel Overview

The 2011 Honda Pilot’s instrument panel is designed for clarity and convenience. The multi-information display provides essential data at a glance‚ including mileage‚ fuel levels‚ and temperature. Gauges such as the speedometer‚ tachometer‚ and fuel level indicator are illuminated for easy readability. The panel also features controls for the audio system‚ climate settings‚ and navigation‚ ensuring intuitive operation. Indicators for cruise control and VSA (Vehicle Stability Assist) are prominently displayed‚ while the ambient temperature display helps monitor external conditions. Steering wheel controls allow for seamless adjustments without distractions‚ enhancing the driving experience. The layout is user-friendly‚ minimizing eye movement and ensuring a safe‚ distraction-free journey. The instrument panel is a central hub for driver convenience and vehicle monitoring‚ ensuring all necessary information is readily accessible.

Maintenance and Care for Your Vehicle

Regular maintenance and proper care are essential for extending the life and performance of your 2011 Honda Pilot. Follow the maintenance schedule in the manual for routine checks‚ oil changes‚ tire pressure‚ and fluid levels. Addressing issues promptly and using genuine Honda parts ensures reliability and prevents costly repairs. Keep your vehicle in optimal condition by adhering to the recommended maintenance plan.

3.1 Maintenance Schedule

The 2011 Honda Pilot Owners Manual outlines a detailed maintenance schedule to ensure optimal vehicle performance. Regular checks include oil changes every 5‚000 to 7‚500 miles‚ tire pressure monitoring‚ and fluid level inspections. The schedule also covers brake pad replacements‚ belt inspections‚ and air filter changes. Adhering to these intervals helps prevent mechanical issues and extends the vehicle’s lifespan. Refer to the manual for specific guidelines tailored to your driving conditions‚ ensuring your Honda Pilot remains in peak condition and runs efficiently for years to come.

3.2 Tips for Extending Vehicle Life

To extend the life of your 2011 Honda Pilot‚ follow these essential tips: avoid extreme temperatures by parking in shaded areas‚ keep the interior clean to prevent wear and tear‚ and wax the exterior regularly to protect the paint. Additionally‚ check for recalls and stay updated on software enhancements. Proper fueling habits‚ such as avoiding low fuel levels‚ can also prevent fuel system damage. By adhering to these tips‚ you can maintain your vehicle’s condition and ensure long-term reliability.

Technical Specifications of the 2011 Honda Pilot

The 2011 Honda Pilot features a 3.5L V6 engine‚ 5-speed automatic transmission‚ and all-wheel drive capability. It is designed as a mid-size SUV‚ offering reliable performance and family-friendly functionality.

4.1 Engine and Performance

The 2011 Honda Pilot is powered by a 3.5-liter V6 engine with Variable Valve Timing and Lift Electronic Control (VTEC). This engine produces 250 horsepower and 253 lb-ft of torque‚ ensuring smooth acceleration and towing capability. The i-VTEC system optimizes performance across different RPM ranges‚ while the Variable Cylinder Management (VCM) enhances fuel efficiency by deactivating cylinders during low-load conditions. This combination delivers a balanced blend of power and efficiency‚ making the Pilot suitable for both daily driving and outdoor adventures.

4.2 Transmission and Drivetrain

The 2011 Honda Pilot features a 5-speed automatic transmission with Grade Logic Control‚ ensuring smooth shifting and optimal performance. The drivetrain options include front-wheel drive (FWD) and all-wheel drive (AWD) systems. The AWD system automatically distributes power to the rear wheels when additional traction is needed‚ enhancing stability and control. This setup provides improved handling on various road conditions while maintaining fuel efficiency. The combination of transmission and drivetrain ensures a balanced and responsive driving experience‚ making the Pilot versatile for both urban and off-road environments.

4.3 Fuel Efficiency

The 2011 Honda Pilot offers EPA-estimated fuel economy ratings of up to 17 MPG city and 23 MPG highway for front-wheel-drive models‚ and 16 MPG city and 22 MPG highway for all-wheel-drive models. These ratings ensure efficient performance while maintaining the vehicle’s powerful capabilities. The Pilot’s 3.5L V6 engine with Variable Cylinder Management (VCM) contributes to improved fuel efficiency by deactivating cylinders during light driving conditions. This feature‚ combined with the smooth-shifting transmission‚ helps maximize mileage without compromising power‚ making the Pilot a practical choice for both daily commuting and long trips.

Troubleshooting Common Issues

This section helps you identify and address common issues with your 2011 Honda Pilot. Learn to recognize symptoms‚ check dashboard warning lights‚ and find solutions. Regular maintenance can prevent many problems‚ ensuring your vehicle runs smoothly. Consult the manual for guidance on troubleshooting and resolving issues efficiently.

5.1 Common Problems and Solutions

The 2011 Honda Pilot may experience issues like ABS light illumination‚ transmission slipping‚ or coolant leaks. For the ABS light‚ check the brake sensor or wiring. Transmission issues may require fluid replacement or solenoid repairs. Coolant leaks can often be traced to the radiator or hoses. Always refer to the manual for diagnostic steps. If problems persist‚ consult a certified Honda technician to ensure proper repairs and maintain your vehicle’s reliability. Regular maintenance can help prevent these issues and keep your Pilot running smoothly; Addressing problems early avoids costly repairs.

5.2 Dashboard Warning Lights

The dashboard warning lights in your 2011 Honda Pilot are designed to alert you to potential issues. Red lights indicate serious problems‚ such as low oil level or high engine temperature‚ requiring immediate attention. Yellow or orange lights signal less urgent issues‚ like a loose gas cap or scheduled maintenance. Green or blue lights typically indicate normal operations‚ such as cruise control activation. Always consult the manual for accurate interpretations of these lights to ensure proper vehicle care and safety. Ignoring warning lights can lead to serious damage. Regular checks and timely responses are crucial. The manual provides detailed explanations and recommended actions for each light. By addressing issues promptly‚ you can prevent costly repairs and maintain your vehicle’s performance. Regular monitoring of these indicators ensures a safe and reliable driving experience. The manual also outlines the steps to reset or clear lights after resolving issues. Always refer to the guide for accurate diagnostics and solutions. This helps in maintaining your 2011 Honda Pilot in optimal condition.

Safety Information and Precautions

Prioritize safety with your 2011 Honda Pilot! This section covers essential safety features‚ precautions‚ and regular checks to ensure a secure driving experience.

6.1 Safety Features

The 2011 Honda Pilot is equipped with advanced safety features to protect you and your passengers. Key features include multiple airbags‚ anti-lock braking system (ABS)‚ and electronic stability control. The vehicle also includes a rearview camera for enhanced visibility. Regular checks of these systems are crucial for optimal performance. Always wear seatbelts and ensure proper use of child restraints. Familiarize yourself with these features to maximize safety and adhere to the guidelines provided in the manual for emergency situations. Safety is a top priority‚ and understanding these features ensures a secure driving experience.

6.2 Emergency Procedures

In case of an emergency‚ your 2011 Honda Pilot is equipped with features to help ensure safety. Know the proper steps for situations like a flat tire‚ engine failure‚ or accident. Always pull over safely and engage hazard lights. The manual provides detailed instructions for handling emergencies‚ including how to use safety systems and roadside assistance. Familiarize yourself with these procedures to respond effectively. Regular checks of emergency equipment‚ like the spare tire and jack‚ are essential. Stay calm and follow guidelines to minimize risks and ensure safety for all occupants.

Warranty and Support Information

The 2011 Honda Pilot is backed by a comprehensive warranty program. This section outlines the coverage details‚ duration‚ and support services available to ensure your peace of mind.

7.1 Warranty Overview

The 2011 Honda Pilot comes with a comprehensive warranty program designed to protect your investment. The New Vehicle Limited Warranty covers repairs for parts and labor for 3 years or 36‚000 miles‚ while the Powertrain Limited Warranty extends coverage for 5 years or 60‚000 miles. Additionally‚ corrosion protection is provided for 5 years with unlimited mileage‚ and emissions-related components are covered for up to 15 years or 150‚000 miles. This warranty package ensures peace of mind and reflects Honda’s commitment to reliability and customer satisfaction.

7.2 Customer Support Contact

Honda offers dedicated customer support to assist with any questions or concerns about your 2011 Pilot. You can reach Honda’s customer service team toll-free at 1-800-999-1009 for 24/7 support. Additionally‚ online support is available through their official website‚ where you can submit inquiries‚ access resources‚ or chat live with representatives. For troubleshooting‚ warranty inquiries‚ or maintenance tips‚ visit the Honda Owners section online. Their support team is ready to provide guidance and ensure your ownership experience is seamless and satisfactory.

Downloading the Owners Manual

The 2011 Honda Pilot Owners Manual is available for free download as a PDF from Honda’s official website or trusted automotive resources online. Simply visit the site‚ select your vehicle model‚ and download the manual instantly for easy access to all the information you need.

8.1 Accessing the PDF Version

To access the PDF version of the 2011 Honda Pilot Owners Manual‚ visit Honda’s official website or trusted automotive resources. Select your vehicle model and year‚ then follow the prompts to download the manual. The PDF is free and instantly accessible‚ allowing you to save it to your device for easy reference. Ensure the file is downloaded from a reliable source to avoid unauthorized modifications. The PDF format is convenient for searching specific topics and printing sections as needed. Keep a digital copy in your vehicle for quick access to essential information.

2014 honda crv manual

The 2014 Honda CR-V manual is a comprehensive guide covering operation, maintenance, and troubleshooting. Available online, it’s essential for optimal vehicle performance and ownership experience.

Overview of the 2014 Honda CR-V

The 2014 Honda CR-V is a compact SUV known for its versatile design and practical features. It offers a spacious interior, comfortable ride, and reliable performance. Available in various trims, the CR-V features a 1.6L or 2.4L engine, depending on the model. With manual or automatic transmission options, it caters to diverse driving preferences. The SUV also boasts advanced safety features and efficient fuel economy, making it a popular choice for both urban and outdoor enthusiasts.

Importance of the Owner’s Manual

The owner’s manual for the 2014 Honda CR-V is a vital resource for understanding and maintaining the vehicle. It provides detailed instructions for operation, troubleshooting, and maintenance, ensuring optimal performance and safety. The manual includes tips for improving fuel efficiency and addressing common issues, helping owners maximize their driving experience. Accessible in PDF format, it serves as a comprehensive guide, essential for preserving the vehicle’s longevity and resale value.

Key Features of the 2014 Honda CR-V

The 2014 Honda CR-V offers a reliable engine, versatile interior, and advanced safety features. It combines fuel efficiency with robust performance, making it a practical choice for everyday driving.

Engine and Transmission Options

The 2014 Honda CR-V offers a range of engine and transmission options, including a fuel-efficient 1.6L diesel engine and a 2.4L petrol engine. Manual and automatic transmissions are available, providing smooth gear shifts and optimal performance. The manual transmission is particularly popular for its precise control, while the automatic ensures a comfortable driving experience. Both options are designed for excellent fuel efficiency, making the CR-V a practical choice for daily commuting and long-distance travel.

Interior and Exterior Design

The 2014 Honda CR-V features a sleek and practical design, both inside and out. The exterior boasts a aerodynamic shape with a bold front grille and sporty alloy wheels. Inside, the cabin offers ample space, premium upholstery options, and intuitive controls. The interior is designed for comfort, with adjustable seating and ample cargo space, making it ideal for families and adventurers. The CR-V’s design balances functionality and style, ensuring a refined driving experience.

Technology and Safety Features

The 2014 Honda CR-V manual highlights advanced technology and safety features. It includes an intuitive infotainment system with Bluetooth connectivity and a multi-information display. Safety features encompass a multi-angle rearview camera, Honda’s ACE body structure for collision protection, and a suite of six airbags. These features enhance driver confidence and passenger protection, ensuring a safer and more connected driving experience.

Understanding the Dashboard and Controls

The 2014 Honda CR-V manual explains the dashboard layout, including the instrument cluster, warning lights, infotainment system, and climate controls, helping drivers stay informed and comfortable.

Instrument Cluster and Warning Lights

The 2014 Honda CR-V manual details the instrument cluster, which displays vital information like speed, fuel level, and temperature. Warning lights indicate issues such as low oil pressure or malfunctioning brakes. Understanding these indicators ensures prompt attention to potential problems. The manual provides a comprehensive guide to interpreting each light, helping drivers maintain safety and prevent unnecessary repairs. Regular checks of these systems are crucial for optimal vehicle performance and longevity.

Infotainment and Navigation System

The 2014 Honda CR-V manual explains the infotainment system, featuring Bluetooth connectivity, USB ports, and optional navigation. The system allows seamless integration of smartphones for music, calls, and apps. Voice commands simplify operation, ensuring safe driving. Customizable settings enable personal preferences for display and functionality; Troubleshooting tips and update instructions are provided in the manual to maintain optimal performance and connectivity. Understanding this system enhances the driving experience and ensures all features are utilized effectively.

Climate Control and Driver Assistance Features

The 2014 Honda CR-V manual details the climate control system, offering dual-zone automatic temperature settings for driver and passenger comfort. Driver assistance features include the Eco Assist system, which helps improve fuel efficiency, and the optional Honda LaneWatch for enhanced visibility. These features are designed to reduce driver fatigue and enhance safety. The manual provides instructions for adjusting settings and troubleshooting common issues, ensuring optimal performance of these advanced systems.

Maintenance Schedule and Tips

The 2014 Honda CR-V manual outlines a recommended maintenance schedule, including regular oil changes every 7,500 miles, tire rotations, and air cleaner replacements. Follow these tips to ensure optimal vehicle performance and longevity.

Recommended Maintenance Intervals

The 2014 Honda CR-V manual specifies regular maintenance intervals to ensure optimal performance. Oil changes are recommended every 7,500 miles, while tire rotations should occur every 6,000 to 8,000 miles. The air cleaner element should be replaced every 15,000 to 30,000 miles. Additionally, the timing belt should be replaced at 105,000 miles to prevent engine damage. Adhering to these intervals ensures reliability, fuel efficiency, and longevity of your vehicle.

Oil Change and Filter Replacement

The 2014 Honda CR-V manual recommends oil changes every 7,500 miles under normal conditions. Use 0W-20 viscosity oil for optimal performance. The oil capacity is approximately 4.2 quarts. Replace the oil filter each time to ensure cleanliness and proper engine function. Always dispose of used oil and filters responsibly. Following these guidelines helps maintain engine health, improves fuel efficiency, and prevents premature wear.

Tire Pressure and Rotation Guidelines

The 2014 Honda CR-V manual specifies tire pressure at 32 PSI for most models, though this may vary depending on trim and load. Check the tire information placard on the driver’s doorjamb or inside the fuel filler door for exact specifications. Rotate tires every 7,500 miles following the pattern in the manual to ensure even tread wear and optimal handling. Proper tire maintenance enhances safety, improves fuel efficiency, and prolongs tire life, while neglecting it can lead to uneven wear and potential vehicle instability.

Common Issues and Troubleshooting

The 2014 Honda CR-V manual addresses common issues like oil leaks, faulty sensors, and transmission problems. It provides diagnostic steps and repair guidance, ensuring proper maintenance.

Diagnosing Common Problems

The 2014 Honda CR-V manual provides detailed guidance for diagnosing issues like oil leaks, faulty sensors, and transmission problems. It outlines symptoms, diagnostic tools, and error codes to identify malfunctions accurately. Users can refer to specific sections for troubleshooting steps, ensuring timely repairs and maintaining vehicle health. Regular checks and adherence to manual instructions help prevent major issues, emphasizing the importance of proactive maintenance for optimal performance and longevity.

Resetting the Maintenance Light

To reset the maintenance light on the 2014 Honda CR-V, turn the ignition to the “ON” position, then press and hold the odometer button. Cycle the ignition from “ON” to “OFF” three times, then release the button. The maintenance light should reset. This process varies slightly depending on the model configuration, but the manual provides detailed steps for accurate completion, ensuring the light is properly cleared after maintenance or repairs.

Addressing Error Codes

When error codes appear on your 2014 Honda CR-V, consult the manual to identify their meaning. Use an OBD-II scanner to retrieve codes, which correspond to specific issues like engine or sensor malfunctions. Refer to the manual for detailed explanations and recommended actions. Addressing error codes promptly ensures proper vehicle function and prevents potential damage. Always follow the manual’s guidance for accurate diagnoses and repairs, or consult a professional for severe issues to maintain your CR-V’s optimal performance and safety.

Performance and Handling

The 2014 Honda CR-V balances fuel efficiency with responsive handling, offering driving modes that enhance performance in various conditions. Its robust engine and precise steering ensure a smooth ride.

Driving Modes and Fuel Efficiency

The 2014 Honda CR-V features an Eco mode that optimizes fuel efficiency by adjusting engine and transmission performance. With an estimated EPA rating of 23 MPG city and 31 MPG highway, it offers excellent fuel economy for its class. The CR-V’s responsive handling and smooth acceleration ensure a balance between performance and efficiency, making it a practical choice for both urban and highway driving. These features contribute to a enjoyable and economical driving experience.

Improving Performance

Regular maintenance is key to optimizing the 2014 Honda CR-V’s performance. Ensuring timely oil changes with high-quality lubricants and maintaining proper tire pressure enhances engine efficiency. Replacing air and fuel filters as recommended also boosts power and fuel economy. For further improvements, consider aftermarket upgrades like performance air intakes or exhaust systems, but always consult the manual to ensure compatibility and avoid voiding warranties. These steps help maximize the CR-V’s capabilities while maintaining reliability.

Safety Features and Precautions

The 2014 Honda CR-V manual emphasizes advanced safety features like multi-angle rearview cameras and ACE body structure. Always follow guidelines for seatbelt use, airbag systems, and emergency procedures to ensure optimal protection and vehicle stability.

Advanced Safety Technologies

The 2014 Honda CR-V manual highlights advanced safety technologies designed to enhance driver and passenger protection. Features include a multi-angle rearview camera for improved visibility, Vehicle Stability Assist for better traction, and an Advanced Compatibility Engineering (ACE) body structure to optimize collision energy absorption. Additionally, technologies like electronic stability control and anti-lock braking systems (ABS) work together to prevent skidding and maintain control. These innovations ensure a safer driving experience, aligning with Honda’s commitment to occupant safety and collision mitigation.

Emergency Procedures

The 2014 Honda CR-V manual outlines essential emergency procedures to ensure driver and passenger safety. It covers proper protocols for situations like brake failure, tire blowouts, and collisions. The manual emphasizes the importance of maintaining control, using safety features like Vehicle Stability Assist, and understanding how to activate emergency systems. Additionally, it provides guidance on post-collision procedures, such as checking for injuries and securing the vehicle. These steps are designed to minimize risks and ensure effective response in critical situations.

Customization and Accessories

The 2014 Honda CR-V manual highlights various customization options, including roof racks, alloy wheels, and interior enhancements, to personalize your vehicle for style and functionality.

Upgrading Your CR-V

Upgrading your 2014 Honda CR-V can enhance performance, style, and functionality; Popular upgrades include installing aftermarket infotainment systems, alloy wheels, and suspension kits. The manual provides guidance on compatible modifications and installation tips. Ensure all upgrades align with Honda’s specifications to maintain safety and reliability. Customizing your CR-V allows for a personalized driving experience, whether for off-road adventures or urban commutes. Always consult the manual before making significant changes to your vehicle.

Installing Aftermarket Accessories

Installing aftermarket accessories on your 2014 Honda CR-V can enhance its functionality and style. The manual provides guidelines for compatible upgrades, ensuring safety and performance. Popular accessories include roof racks, cargo organizers, and infotainment systems. Always follow the manufacturer’s instructions and consult the manual for specific installation tips. Ensure compatibility with your vehicle’s specifications to avoid malfunctions. Proper installation of aftermarket accessories can improve your driving experience and vehicle utility, while maintaining its reliability and warranty compliance.

The 2014 Honda CR-V manual is a vital resource for owners, offering detailed guidance on maintenance, troubleshooting, and customization. Refer to it regularly for optimal vehicle performance and long-term satisfaction.

Final Tips for Optimal Usage

The 2014 Honda CR-V manual is an essential resource for owners. Regularly review maintenance schedules, ensure timely oil changes, and check tire pressure. Familiarize yourself with the infotainment system and safety features for enhanced driving. Always refer to the manual for troubleshooting and customization guidance. Keep the manual in your vehicle for quick access. By following these tips, you can maximize performance, safety, and longevity of your CR-V.

Resources for Further Assistance

The 2014 Honda CR-V manual is widely available online as a free PDF download. Visit Honda’s official website or trusted automotive forums for additional support. Owners can also access maintenance schedules, troubleshooting guides, and customization tips through these resources. Engage with Honda CR-V communities for shared experiences and expert advice, ensuring optimal use and care of your vehicle.

craftsman snowblower maintenance manual

Regular maintenance ensures your Craftsman snowblower operates efficiently, prolongs its lifespan, and maintains safety. Follow the manual for optimal performance and warranty compliance.

1.1 Overview of the Importance of Regular Maintenance

Regular maintenance is crucial for ensuring your Craftsman snowblower functions efficiently and safely. It prevents mechanical failures, extends the lifespan of components, and ensures optimal performance during harsh winter conditions. Proper upkeep also maintains warranty validity and reduces repair costs. By following the manual’s guidelines, you can prevent wear and tear, ensuring reliable operation and safety throughout the snowblower’s service life.

1.2 Understanding the Craftsman Snowblower Manual

The Craftsman snowblower manual is a comprehensive guide providing detailed instructions for assembly, operation, and maintenance. It includes safety guidelines, maintenance schedules, and troubleshooting tips to ensure optimal performance. The manual also covers warranty information and repair procedures. Reading and understanding the manual is essential for proper usage, safety, and extending the lifespan of your snowblower. It is available on the official Sears website for easy access.

Pre-Maintenance Checks

Ensure safety by disconnecting the spark plug and checking for worn or damaged parts. Gather all necessary tools and equipment before starting maintenance tasks.

2.1 Safety Precautions Before Starting Maintenance

Always consult the owner’s manual for specific safety guidelines; Disconnect the spark plug to prevent accidental startups. Wear protective gear, including gloves and safety glasses. Ensure the snowblower is on a stable, level surface. Never leave maintenance tasks to inexperienced individuals. Be aware of potential hazards like sharp edges or moving parts. Proper ventilation is essential when working with fuel or electrical components.

2.2 Gathering Necessary Tools and Equipment

Gather essential tools like screwdrivers, wrenches, and pliers. Ensure you have a clean workspace and a bucket for oil drainage. Refer to the owner’s manual for specific tools recommended. Keep rags and cleaning cloths handy for spills and wipe-downs. Having a torque wrench and socket set can be useful for bolts and nuts. Properly organize all equipment to streamline the maintenance process and avoid delays.

Regular Maintenance Tasks

Regular maintenance tasks for your Craftsman snowblower include checking for wear, ensuring all parts are in good condition, and following the manual’s guidelines for upkeep.

3.1 Lubricating Moving Parts

Lubricating moving parts is crucial for smooth operation and preventing wear. Use the recommended lubricant on the auger, impeller, and gears as per the manual. Regular lubrication ensures optimal performance and extends the machine’s life. Always refer to the manual for specific guidelines to maintain warranty compliance and efficiency.

3.2 Checking and Replacing the Auger and Blades

Inspect the auger and blades regularly for wear or damage. Refer to the manual for replacement guidelines to ensure proper function. Dull or damaged blades can reduce efficiency and safety. Replace worn parts promptly to maintain optimal performance and avoid further damage to the machine. Always follow the manual’s instructions for safe and effective replacement.

3.3 Inspecting and Maintaining the Drive System

Inspect the drive system for wear or damage. Lubricate gears and belts as recommended in the manual to ensure smooth operation. Check belt tension and adjust if necessary. Replace worn or damaged belts and gears promptly to prevent system failure. Always disconnect the spark plug before performing maintenance. Regular inspection and maintenance of the drive system ensure reliable performance and extend the lifespan of your Craftsman snowblower.

3.4 Ensuring Proper Tire Pressure and Tread

Check tire pressure when tires are cold, as specified in the manual. Proper pressure ensures stability and traction. Inspect tread for wear or damage; uneven wear may indicate misaligned or worn drive components. Clean debris from treads to maintain grip. Low pressure or worn tread can reduce performance and control. Regular checks prevent issues and ensure safe, effective operation of your Craftsman snowblower in snowy conditions.

Storage and Seasonal Preparation

Clean the snowblower thoroughly, drain fuel, and inspect for damage before storage. Store in a dry, secure location to protect against rust and wear. Consult the manual for specific seasonal preparation tips to ensure optimal condition for the next winter season.

4.1 Cleaning the Snowblower Before Storage

Clean the snowblower thoroughly, removing snow, ice, and debris from all surfaces. Check for blockages in the chute and auger. Use a soft brush or cloth to wipe down components. Lubricate moving parts to prevent rust. Allow the machine to dry completely before storing to avoid corrosion. Follow the manual’s cleaning instructions to ensure proper preparation for offseason storage and maintain optimal condition.

4.2 Proper Storage Techniques to Prevent Damage

Store your Craftsman snowblower in a dry, cool, and well-ventilated area to prevent rust and damage. Keep it away from direct sunlight and moisture. Cover the machine with a breathable cover to protect from dust. Drain old fuel or stabilize it with a fuel additive. Disconnect the battery and store it separately. Follow these steps to ensure the snowblower remains in excellent condition for the next winter season.

Troubleshooting Common Issues

Identify common problems like engine issues or auger malfunctions by referencing the manual. Regular checks and proper maintenance often resolve these issues quickly and effectively.

5.1 Diagnosing Problems with the Engine

Engine issues often stem from lack of maintenance or worn components. Check valve clearance annually or every 200-300 hours, as outlined in the manual. Ensure proper lubrication and tune-ups are performed regularly. Faulty spark plugs, clogged carburetors, or incorrect fuel types can also cause problems. Refer to the troubleshooting section in the manual for specific diagnostic steps and solutions to restore engine performance and ensure warranty compliance.

5.2 Addressing Issues with the Auger and Impeller

Common auger and impeller issues include blockages, worn blades, or misalignment. Regularly inspect and clear debris to ensure smooth operation. Replace damaged or dull blades as outlined in the manual. Lubricate moving parts to prevent friction and wear. Addressing these issues promptly prevents further damage and ensures efficient snow removal performance, while also maintaining warranty coverage for defective parts. Refer to the manual for specific repair instructions.

Warranty and Support Information

Craftsman snowblowers are backed by a comprehensive warranty program. Contact Sears for repairs or replacements under warranty. Visit www.craftsman.com for support and detailed warranty terms.

6.1 Understanding the Craftsman Warranty Program

The Craftsman warranty program ensures defective parts are repaired or replaced free of charge for a specified period. Coverage typically lasts two years from purchase, with options for extended plans. Maintenance as per the manual is required for warranty validity. Visit www.craftsman.com or contact Sears directly for detailed terms and conditions, ensuring your snowblower remains protected and functional throughout its lifespan;

6.2 Contacting Sears for Repair or Replacement

Visit www.craftsman.com or contact Sears directly for repair or replacement inquiries. Call 1-866-576-5777 for assistance with defective parts. Sears offers warranty coverage for up to two years, ensuring free repairs or replacements for faulty components. Proper maintenance, as outlined in the manual, is essential for warranty validity. Sears provides reliable support to keep your snowblower functioning optimally throughout its lifespan.

Safety Tips and Best Practices

Always wear safety gear and follow manual guidelines. Ensure proper assembly, pre-operation checks, and stay alert to surroundings. Regular maintenance is key for optimal safety and performance.

7.1 Operating the Snowblower Safely

Before starting, ensure the area is clear of obstacles and wear protective gear. Operate the snowblower on stable ground, avoiding steep slopes. Keep loose clothing tied back and never touch moving parts. Always follow the manual’s safety guidelines for proper handling. After use, turn off the engine and allow it to cool before storage. Proper safety practices ensure efficient and accident-free operation.

7.2 Avoiding Common Maintenance Mistakes

Avoid common mistakes by adhering to the manual’s guidelines. Neglecting lubrication, ignoring worn parts, and improper storage are frequent oversights. Always check belts and tires before use. Ensure the snowblower is stored in a dry, clean area. Skipping routine inspections can lead to costly repairs. Proper maintenance habits prevent issues and extend the lifespan of your Craftsman snowblower.

Regular maintenance ensures optimal performance, safety, and longevity of your Craftsman snowblower. Follow the manual’s guidelines for proper care and storage to maximize its efficiency and lifespan.

8.1 Summarizing Key Maintenance Steps

Regular maintenance is crucial for optimal performance. Key steps include lubricating moving parts, inspecting the auger and blades, checking the drive system, and ensuring proper tire pressure. Clean the snowblower before storage and follow the manual’s guidelines for seasonal preparation. Addressing issues promptly and adhering to warranty instructions ensures longevity and safety. Proper care and storage maximize efficiency and extend the lifespan of your Craftsman snowblower.

8.2 Encouraging Ongoing Maintenance for Longevity

Consistent maintenance is essential for extending the life of your Craftsman snowblower. By following the manual’s guidelines, you ensure optimal performance and warranty compliance; Regular lubrication, inspections, and timely repairs prevent major issues. Investing time in proper care not only enhances efficiency but also guarantees reliability during harsh winter conditions. Remember, routine upkeep is a small effort for long-term durability and safety.