cold brew coffee maker instructions

Cold brew coffee has gained popularity for its smooth, low-acidity flavor. This guide provides easy step-by-step instructions to brew perfect cold coffee at home using a coffee maker.

What is Cold Brew Coffee?

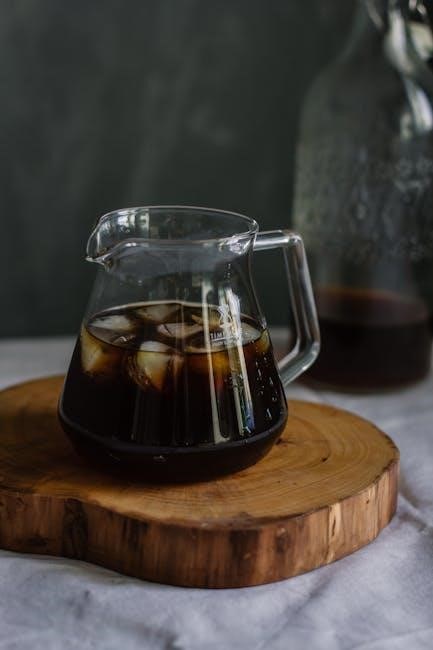
Cold brew coffee is a unique brewing method where coarse-ground coffee beans steep in cold water for 12–24 hours. This process extracts flavors without heat, resulting in a smooth, low-acidity coffee. Unlike hot-brewed coffee, cold brew avoids the risk of burnt or over-extracted flavors, creating a sweeter and less bitter taste. The immersion method ensures all coffee grounds are submerged, preventing under-extraction. The extended steeping time allows the coffee’s natural oils and flavors to slowly release, producing a rich and full-bodied drink. Cold brew is highly versatile and can be enjoyed over ice, with milk, or even used in coffee-based cocktails. Its refreshing taste makes it a perfect choice for hot summer days, appealing to both coffee enthusiasts and casual drinkers alike.

Why Use a Cold Brew Coffee Maker?

A cold brew coffee maker simplifies the brewing process, ensuring consistent results. It eliminates the need for multiple containers and manual stirring, making cleanup easier. The maker’s built-in filter and steeping container streamline the process, reducing mess and effort. Unlike using a French press or Mason jar, a dedicated cold brew maker is designed specifically for this method, ensuring optimal extraction and flavor. It also prevents over-extraction, which can occur with manual methods. The compact design saves space and makes storage convenient. Overall, a cold brew coffee maker offers efficiency, convenience, and superior flavor control, making it a worthwhile investment for coffee enthusiasts.

Choosing the Right Equipment

Choosing the right equipment is essential for perfect cold brew. Options include French presses, Mason jars, or dedicated cold brew makers. Consider size, ease of use, and cleanup. A built-in filter and steeping container streamline the process, ensuring flavorful results. Dedicated makers offer convenience and better extraction, making them a popular choice for coffee enthusiasts.

Cold Brew Coffee Makers: Types and Features

Cold brew coffee makers come in various styles, each offering unique features. Glass, plastic, or stainless steel models are common, with built-in filters for easy straining. Some makers include adjustable steeping times, while others have compact designs for convenience. High-end models may feature grinders or multiple chambers for precise extraction. Portable options are great for travel, while large-capacity makers suit households. Key features to consider include ease of cleaning, durability, and compatibility with storage. These designs cater to different preferences, ensuring a smooth and flavorful brewing experience tailored to individual needs.

Additional Tools: Grinder, Scale, and Storage

A grinder ensures freshly ground coffee beans, essential for optimal flavor. A scale helps measure precise coffee-to-water ratios, guaranteeing consistency. Proper storage containers, like glass or stainless steel, preserve the brew’s freshness. These tools enhance the brewing process, ensuring a perfect cup every time.

Step-by-Step Brewing Instructions

Start with grinding beans, mix with water, steep for 12-24 hours, then strain. This simple process ensures smooth, full-bodied cold brew coffee every time.

Grinding the Coffee Beans

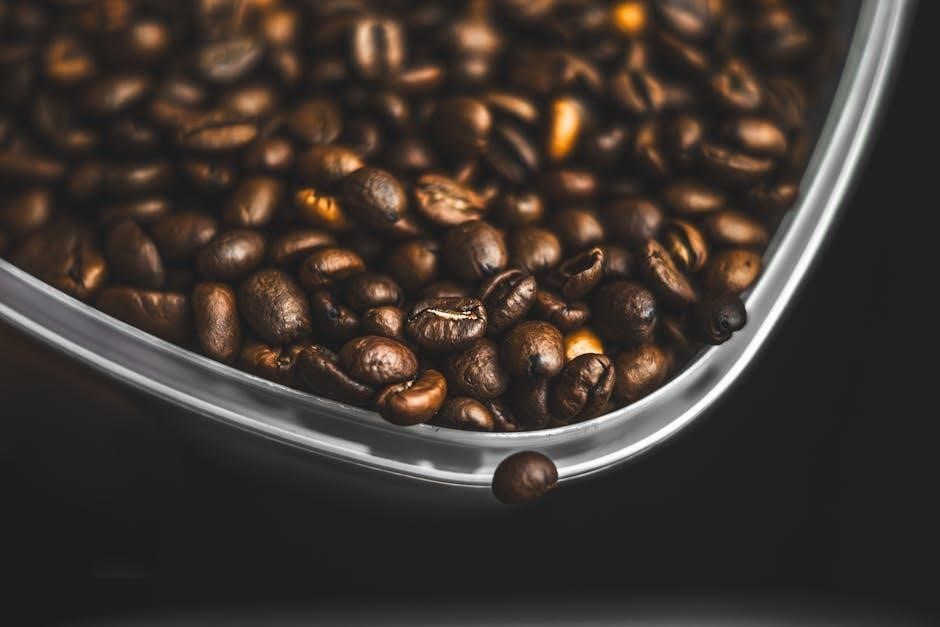
Start by grinding your coffee beans to a coarse or medium-coarse texture. A burr grinder is ideal, but a spice grinder with short pulses works too. Avoid fine grinds, as they can lead to over-extraction and a bitter taste. Coarse grinding ensures optimal flavor extraction during the steeping process. For the best results, grind the beans just before brewing to preserve freshness and aroma. If using pre-ground coffee, ensure it’s specifically labeled as “coarse grind” for cold brew. Proper grinding is essential for achieving the smooth, balanced flavor cold brew is known for. This step sets the foundation for a perfect brew.

Mixing Coffee Grounds with Water

After grinding, combine the coarse coffee grounds with water in a large container or the cold brew maker’s chamber. Use a 1:4 to 1:8 coffee-to-water ratio for a balanced brew. Stir thoroughly to ensure all grounds are evenly saturated. Use fresh, room-temperature water for optimal extraction. If using a dedicated cold brew maker, place the grounds in the filter or infuser, then add water gradually, stirring gently. Ensure no dry spots remain. Cover the container or seal the maker to prepare for steeping. Proper mixing ensures consistent flavor and prevents under- or over-extraction during the brewing process. This step is crucial for achieving the signature smoothness of cold brew coffee.

Steeping the Coffee

Once mixed, the coffee grounds and water mixture needs to steep. Place the container or cold brew maker in the refrigerator to steep for 12 to 24 hours. The longer it steeps, the stronger the flavor becomes. Stir the grounds gently halfway through steeping to ensure even extraction. Keep the mixture at refrigerator temperature (around 40°F) to prevent over-extraction and bitterness. Avoid steeping at room temperature, as it can lead to unwanted flavors. After steeping, the coffee is ready to strain and serve. This slow, cold process extracts flavors without the acidity of hot-brewed coffee, resulting in a smooth and refreshing drink;

Straining the Brew

After the steeping process, carefully strain the coffee to separate the grounds from the liquid. If using a cold brew maker, remove the filter or infuser from the container. For other methods, pour the mixture through a fine-mesh sieve or cheesecloth into another container. Ensure no grounds remain in the brew to avoid bitterness. Discard the solids and transfer the strained coffee to a clean glass bottle. Store it in the refrigerator to chill before serving. Proper straining ensures a smooth, flavorful cold brew. This step is crucial for achieving the desired taste and texture. Your cold brew is now ready to enjoy!

Customizing Your Cold Brew

Personalize your cold brew by adjusting the coffee-to-water ratio, adding flavorings like vanilla or cinnamon, or sweetening with sugar or syrup. Experiment with milk or ice for unique variations.

Adjusting Coffee-to-Water Ratio

Adjusting the coffee-to-water ratio is key to achieving your desired flavor profile in cold brew. A standard ratio is 1:4 to 1:8 (coffee to water by weight). Start with 1:4 for a bold brew or 1:8 for a lighter taste. Experiment by increasing or decreasing coffee for stronger or weaker flavors. Use a scale for precise measurements. For example, 100g of coffee with 400ml water yields a balanced cold brew. If too strong, add water; if too weak, add coffee. Adjusting the ratio allows you to customize the brew to your taste preferences, ensuring each batch is tailored to your liking.

Adding Flavorings and Sweeteners

Cold brew coffee can be customized with various flavorings and sweeteners to enhance its taste. Popular additions include vanilla extract, cinnamon, or citrus zest for unique flavor profiles. For sweetness, options like sugar, honey, or syrup can be added after brewing. Milk or creamers can also be incorporated for a creamier texture. Experiment with different combinations to find your perfect blend. When adding flavorings, mix them into the coffee before steeping for even distribution. Sweeteners are best added after straining to ensure they dissolve properly. This step allows you to tailor your cold brew to your taste preferences, making each cup uniquely delicious and personalized.

Serving Suggestions: Hot, Iced, or Blended

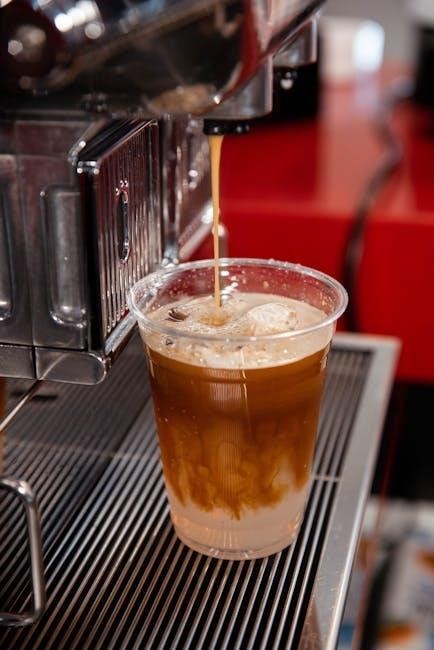
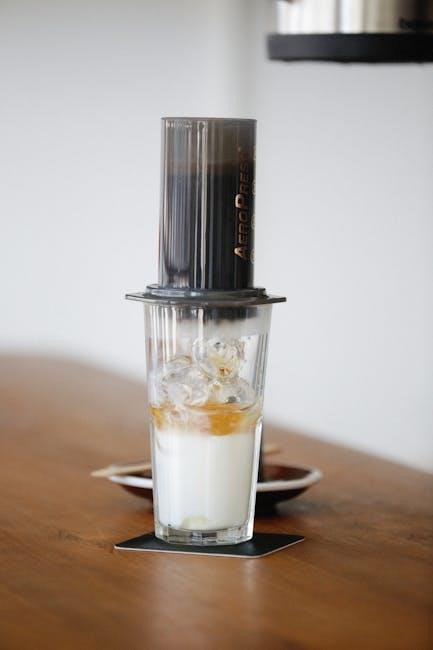
Cold brew coffee offers versatility in how it’s enjoyed. For a refreshing drink, serve it over ice with water or milk. To enjoy it hot, simply heat the brewed coffee and add your preferred sweeteners or creamers. For a blended treat, combine cold brew with ice, milk, and flavorings like vanilla or chocolate in a blender. You can also customize it further by adding syrups, whipped cream, or spices. Experimenting with these methods allows you to enjoy cold brew in various ways, whether you prefer a classic iced coffee, a warm pick-me-up, or a creamy blended beverage. This versatility makes cold brew a perfect choice for any time of day or season.

Maintenance and Troubleshooting

Regularly clean your cold brew coffee maker to prevent residue buildup. For troubleshooting, check water flow, coffee-to-water ratio, and steeping time to ensure optimal flavor consistency.

Cleaning Your Cold Brew Coffee Maker

Cleaning your cold brew coffee maker is essential for maintaining freshness and preventing residue buildup. Rinse the maker thoroughly with warm water after each use. For deeper cleaning, mix equal parts water and mild dish soap, soak the components for 10-15 minutes, then scrub and rinse. Avoid harsh chemicals or abrasive cleaners, as they may damage materials. Dry all parts completely to prevent moisture buildup. Regular cleaning ensures your cold brew tastes fresh and prevents any lingering flavors from affecting future batches. For tough stains, a vinegar and water solution can be used periodically. Always follow the manufacturer’s care instructions for specific models.

Troubleshooting Common Issues

Common issues with cold brew coffee makers often relate to flavor or functionality. If your brew tastes weak, check the coffee-to-water ratio or steeping time. For stronger coffee, increase the grind quantity or extend the steeping period. Sediment in the brew may indicate improper straining or a damaged filter. Ensure the filter is tightly sealed and replace it if necessary. If water isn’t flowing through the maker, check for blockages in the mesh or tubes. Clean the maker regularly to avoid residue buildup. For slow dripping, ensure the maker is properly assembled. Always refer to the manufacturer’s guide for specific troubleshooting steps. Addressing these issues ensures consistently great-tasting cold brew every time.

Cold brew coffee is a delightful and refreshing beverage that’s perfect for any time of the year. By following the step-by-step instructions and tips provided, you can effortlessly create smooth, flavorful cold brew at home. Experiment with ratios, steeping times, and flavor additions to tailor your brew to your taste preferences; With the right equipment and a little patience, you’ll enjoy high-quality cold brew coffee without the need for expensive cafe visits. Whether you prefer it over ice, mixed with milk, or blended into a refreshing drink, cold brew offers endless possibilities; Happy brewing and enjoy the perfect cup every time!

canon 5d mark iii instruction manual

The Canon EOS 5D Mark III is a high-performance DSLR camera featuring a 22.3MP full-frame CMOS sensor, 61-point autofocus, and DIGIC 5 processor for enhanced imaging capabilities.

Overview of the Camera

The Canon EOS 5D Mark III is a professional-grade DSLR camera designed for photographers and videographers seeking high-quality results. It features a 22.3MP full-frame CMOS sensor, offering excellent image detail and low-light performance. The camera is built with a durable, weather-sealed body, making it suitable for challenging environments. With a 61-point autofocus system and DIGIC 5 image processor, it delivers fast and precise performance. The EOS 5D Mark III also supports HD video recording and manual audio controls, catering to multimedia creators. Its ergonomic design and intuitive controls provide easy access to settings, ensuring a seamless shooting experience for both stills and video.

Key Features and Capabilities

The EOS 5D Mark III boasts a 22.3MP full-frame CMOS sensor, offering exceptional image quality and low-light sensitivity. Its 61-point autofocus system ensures precise subject tracking, while the DIGIC 5 processor enables rapid shooting at up to 6 fps. The camera supports ISO ranges from 100 to 25600, expandable to 102400, and features advanced noise reduction. It records Full HD video at 1080p with manual audio level control and headphone jack for monitoring. Additional features include a 3.2-inch LCD screen, weather-sealed construction, and compatibility with Canon EF lenses. These capabilities make it a versatile tool for professional photography and videography, delivering outstanding performance in various shooting conditions.

Camera Specifications

The EOS 5D Mark III features a 22.3MP full-frame CMOS sensor, DIGIC 5 processor, and 61-point AF system, offering high-speed and precise performance for photographers and videographers.

Image Sensor and Resolution

The Canon EOS 5D Mark III features a 22.3-megapixel full-frame CMOS sensor, measuring approximately 36mm x 24mm. This high-resolution sensor captures detailed images up to 5760 x 3840 pixels. The full-frame design ensures exceptional image quality, with excellent low-light performance and dynamic range. The sensor supports aspect ratios of 3:2 and 16:9, offering flexibility for various shooting needs. Its back-illuminated technology enhances light capture, reducing noise and improving clarity, especially in challenging lighting conditions. The sensor’s weather-sealed design protects against dust and moisture, making it durable for outdoor and professional use.

DIGIC 5 Image Processor

The DIGIC 5 Image Processor powers the Canon EOS 5D Mark III, delivering faster processing speeds and improved image quality. It enhances noise reduction, enabling cleaner images at high ISOs. The processor supports continuous shooting up to 6 frames per second, making it ideal for capturing dynamic subjects. It also accelerates autofocus performance, ensuring quick and precise subject tracking. Additionally, the DIGIC 5 improves video recording capabilities, offering enhanced color accuracy and reduced artifacts in HD footage. Its efficient design ensures optimal battery performance, allowing extended shooting sessions. This advanced processor is a key factor in the camera’s overall performance and versatility for both stills and video.

61-Point Autofocus System

The Canon EOS 5D Mark III features a 61-point High Density Reticular Autofocus system, offering exceptional speed, accuracy, and flexibility. This advanced system includes 41 cross-type AF points, providing precise focus detection even in challenging lighting conditions. The autofocus points are spread widely across the frame, enabling effective tracking of moving subjects. The system supports AF at f/2.8 or faster lenses and operates in low light conditions as low as EV-2. This makes it ideal for capturing sharp images in various scenarios, from portraits to wildlife photography. The 61-point AF system ensures rapid and reliable focus acquisition, enhancing overall shooting efficiency and creativity for photographers.

Understanding Camera Controls

Mastering the Canon EOS 5D Mark III’s controls is essential for optimizing performance. The mode dial offers quick access to shooting modes, while custom functions and ergonomic design enhance operation.

Mode Dial and Shooting Modes

The Canon EOS 5D Mark III’s mode dial provides intuitive access to various shooting modes. Options include Manual (M), Aperture Priority (Av), Shutter Priority (Tv), and Program (P) modes for creative control. Additionally, the dial features Scene Intelligent Auto mode for automatic settings and Creative Auto mode for user-defined adjustments. Custom modes (C1-C3) allow photographers to save and quickly access personalized settings, enhancing workflow efficiency; This versatility ensures that photographers can adapt to diverse shooting scenarios efficiently, making the 5D Mark III a powerful tool for both professionals and enthusiasts.

Custom Functions and Settings

The Canon EOS 5D Mark III offers extensive customization through its Custom Functions and settings. These allow users to tailor camera behavior to their preferences, such as adjusting autofocus tracking sensitivity or setting default ISO values. The camera provides 13 Custom Functions, each with multiple options, enabling precise control over features like exposure, autofocus, and metering modes. Additionally, personalizing settings such as button assignments and display options enhances usability. This level of customization ensures photographers can streamline their workflow and optimize the camera for their specific needs, making the 5D Mark III highly adaptable for various shooting styles and professional requirements.

Button Layout and Ergonomics

The Canon EOS 5D Mark III features an intuitive button layout designed for efficient operation. Ergonomically placed controls, like the mode dial and AF-ON button, provide quick access to essential functions. The camera’s weather-sealed design ensures durability in harsh conditions. The button layout mimics previous EOS models, making it familiar for experienced users. Key buttons such as ISO, exposure compensation, and white balance are strategically positioned for easy reach. The rear Quick Control dial and joystick enable seamless navigation and focus point selection. This logical design reduces eye movement and streamlines workflow, allowing photographers to focus on their creative process. The ergonomic grip and balanced weight enhance comfort during extended use.

Shooting Modes and Settings

The Canon EOS 5D Mark III offers various shooting modes, including Manual, Aperture Priority, Shutter Priority, and custom settings for ISO, white balance, and noise reduction.

Aperture Priority, Shutter Priority, and Manual Modes

The Canon EOS 5D Mark III offers Aperture Priority (Av), Shutter Priority (Tv), and Manual (M) modes for precise control over exposures. In Aperture Priority, users set the aperture, and the camera adjusts the shutter speed. Shutter Priority allows setting the shutter speed, with the camera adjusting the aperture. Manual mode provides full control over both aperture and shutter speed for customized results. These modes are ideal for creative photography, enabling photographers to achieve specific effects like depth of field or motion blur. The camera’s intuitive interface and advanced metering system ensure accurate exposures, even in complex lighting conditions.

ISO Sensitivity and Noise Reduction

The Canon EOS 5D Mark III features an ISO range of 100 to 25600, expandable to 102400, ensuring versatility in low-light conditions. The DIGIC 5 processor enhances noise reduction, minimizing grain while maintaining image detail. Users can adjust noise reduction settings to balance detail retention and smoothness. Additionally, the camera offers silent shooting modes for discrete operation. These capabilities make it suitable for professional photographers capturing high-quality images in diverse lighting environments, from bright studios to dimly lit events. The combination of high ISO sensitivity and advanced noise reduction ensures crisp and clear results, even in challenging situations.

White Balance and Color Settings

The Canon EOS 5D Mark III offers extensive control over white balance and color settings, ensuring accurate and customizable image capture. Users can select from preset options like Daylight, Shade, Tungsten, and Fluorescent, or use the Custom White Balance feature to set a specific color temperature. The camera also allows for fine-tuning white balance in amber-blue and magenta-green axes, providing precise control over color tones. Additionally, the EOS 5D Mark III supports color space selection between sRGB and Adobe RGB, catering to professional photographers who require consistent color accuracy. These features, combined with in-camera processing options for RAW images, enable photographers to achieve their desired aesthetic with ease and precision.

Video Recording Capabilities

The Canon EOS 5D Mark III excels in video recording, offering Full HD (1080p) shooting with frame rates up to 60 fps and manual audio level control for enhanced videography.

HD Video Shooting and Frame Rates

The Canon EOS 5D Mark III offers high-quality HD video recording at 1080p resolution, with frame rates of 24, 25, 30, 50, and 60 fps. This flexibility allows videographers to achieve cinematic results, with smooth motion and reduced moiré and artifacts; The camera supports both ALL-I and IPB compression methods, providing options for file size and quality. Manual control over exposure settings, including aperture, shutter speed, and ISO, ensures precise adjustments during filming. Additionally, the camera’s 61-point autofocus system and face detection enhance subject tracking and focus accuracy in video mode, making it ideal for professional and creative video production. The EOS 5D Mark III also supports timecode embedding for easier editing workflows.

Manual Audio Level Control and Headphone Jack

The Canon EOS 5D Mark III features manual audio level control, allowing users to adjust sound levels in 64 increments for precise control during video recording. This ensures high-quality audio capture, reducing the need for post-production adjustments. The camera also includes a headphone jack, enabling real-time audio monitoring to identify and address issues instantly. These features are particularly beneficial for videographers and professionals who prioritize sound quality. The manual audio control complements the camera’s HD video capabilities, enhancing overall multimedia production. This combination of advanced audio tools makes the EOS 5D Mark III a versatile choice for both photography and videography applications.

Connectivity and Transfer Options

The Canon EOS 5D Mark III offers HDMI output for external monitoring, USB for direct computer connection, and compatibility with Wi-Fi for wireless file transfers, enhancing workflow efficiency.

HDMI Output for External Monitoring

The Canon EOS 5D Mark III features an HDMI output, enabling connection to external monitors or recorders for real-time video preview. This functionality is particularly useful for videographers, allowing precise monitoring of framing, focus, and color accuracy during shoots. The camera supports 1080p output, ensuring high-quality video playback and live view. Additionally, the HDMI port supports uncompressed video output, which is beneficial for capturing footage directly to external devices without compression artifacts. Users can also utilize this feature for reviewing recorded footage on larger screens, enhancing post-production workflows. The HDMI mini port ensures compatibility with a wide range of external devices, making it a versatile tool for professional and amateur filmmakers alike.

Transfer Options: USB, Wi-Fi, and Memory Cards

The Canon EOS 5D Mark III offers versatile transfer options for efficient file management. The USB 3.0 port enables high-speed data transfer to computers, while Wi-Fi connectivity allows wireless sharing to compatible devices. Using the EOS Utility software, users can transfer images and videos directly to a computer or via a network. Additionally, the camera supports memory cards, including CF and SDHC/SDXC formats, for storage flexibility. Dual card slots enable overflow recording or separate storage for photos and videos. These options ensure seamless workflows, whether in the studio or on location, providing photographers with reliable ways to manage and transfer their content efficiently.

centigrade to fahrenheit chart pdf

Understanding temperature conversion is crucial in science and everyday life. This guide explains converting Centigrade (Celsius) to Fahrenheit, with a handy chart for quick reference.

Importance of Temperature Conversion

Temperature conversion is essential in various fields, including cooking, climate science, and health. Accurate conversions ensure recipes are executed correctly and medical treatments are administered safely. In scientific research, uniform temperature measurements are critical for data accuracy. Everyday weather forecasts rely on Fahrenheit and Celsius conversions to cater to global audiences. The Centigrade to Fahrenheit chart PDF serves as a quick reference tool, simplifying conversions for professionals and enthusiasts alike. Its portability and ease of use make it invaluable for educational and practical applications, ensuring precise temperature translations across different scales.

Overview of the Centigrade to Fahrenheit Chart PDF

The Centigrade to Fahrenheit Chart PDF is a practical tool designed for quick and accurate temperature conversions. It features a detailed table listing Celsius temperatures alongside their Fahrenheit equivalents, spanning a wide range of values. The chart is organized in an easy-to-read format, making it ideal for both professionals and students. Key conversions, such as the freezing and boiling points of water (0°C/32°F and 100°C/212°F), are highlighted for quick reference. Its PDF format ensures portability and compatibility across devices, allowing users to download, print, or share the chart effortlessly. This resource is particularly useful for scientific experiments, cooking, and understanding weather forecasts in different regions.

Understanding the Celsius and Fahrenheit Scales

The Celsius and Fahrenheit scales are widely used for measuring temperature. Celsius, developed by Anders Celsius, is based on water freezing at 0°C and boiling at 100°C. Fahrenheit, created by Gabriel Fahrenheit, uses 32°F for water freezing and 212°F for boiling. Both scales are essential in science and daily life, with Celsius being the standard in most countries and Fahrenheit commonly used in the United States. Understanding their differences is key for accurate conversions, especially in fields like meteorology, cooking, and engineering.

What is the Celsius Scale?

The Celsius scale, also known as the Centigrade scale, is a widely used temperature scale. It was developed by Swedish astronomer Anders Celsius in 1742. On this scale, water freezes at 0°C and boils at 100°C under standard atmospheric pressure. These reference points make it a logical and consistent system for scientific and everyday use. The Celsius scale is the standard in most countries and is part of the metric system. It is commonly used in weather forecasting, cooking, and scientific research. Its simplicity and clear reference points make it a preferred choice for measuring temperature accurately. Understanding the Celsius scale is essential for conversions and comparisons in various fields.

What is the Fahrenheit Scale?

The Fahrenheit scale is a temperature scale developed by German physicist Gabriel Fahrenheit in 1724. It is widely used in the United States and a few other countries. On this scale, water freezes at 32°F and boils at 212°F under standard atmospheric pressure. These reference points define the scale, which is divided into 180 equal parts between the freezing and boiling points of water. The Fahrenheit scale was historically significant and is still commonly used in everyday applications, such as weather forecasts and cooking, in certain regions. Understanding the Fahrenheit scale is essential for converting temperatures, especially when using a Centigrade to Fahrenheit chart for quick reference and accurate conversions.

The Conversion Formula

The formula to convert Celsius to Fahrenheit is F = (9/5) * C + 32. This equation adjusts the Celsius temperature to the Fahrenheit scale, ensuring accurate conversions for various applications and references.

Mathematical Formula for Celsius to Fahrenheit

The precise formula to convert temperatures from Celsius to Fahrenheit is F = (9/5) * C + 32. This equation ensures accurate conversion by first multiplying the Celsius temperature by 9/5 and then adding 32 to adjust for the difference in scale origins. For example, 0°C (freezing point of water) converts to 32°F, while 100°C (boiling point) becomes 212°F. This formula is fundamental for scientific calculations, cooking, and weather forecasting, providing a reliable method to switch between the two scales. It is widely used in various applications, making it essential for understanding temperature conversions globally.

Step-by-Step Guide to Using the Formula

To convert Celsius to Fahrenheit, follow these easy steps:

Identify the temperature in Celsius (C) that you want to convert.

Apply the formula: F = (9/5) * C + 32. Multiply the Celsius temperature by 9/5;

Add 32 to the result from step 2 to adjust for the Fahrenheit scale.

Calculate the final value to get the temperature in Fahrenheit (F).

For example, to convert 30°C:
F = (9/5) * 30 + 32 = 54 + 32 = 86°F.

This method ensures accurate and quick conversions, making it ideal for reference charts and everyday use.

Creating a Centigrade to Fahrenheit Chart

A well-organized chart simplifies temperature conversions, ensuring clarity and ease of use for quick reference in various applications.

Designing the Chart for Clarity

A clear and well-structured Centigrade to Fahrenheit chart is essential for easy comprehension. Start with a clean layout, ensuring columns for Celsius and Fahrenheit are distinct and aligned. Use bold headers to label each scale, enhancing readability. Incorporate a balanced temperature range, from freezing to boiling points, to cover common conversions. Choose a readable font size and style, avoiding clutter. Consider adding grid lines to separate rows without overwhelming the viewer. For digital versions, use color coding to differentiate scales. Ensure the chart is scalable for both digital and print formats. These design elements make the chart user-friendly and accessible for quick reference in various applications.

Including Key Temperature Conversions

To enhance usability, the Centigrade to Fahrenheit chart should include key temperature conversions that are frequently referenced. Start with essential points like the freezing and boiling points of water, which are 0°C (32°F) and 100°C (212°F), respectively. Add common temperatures such as room temperature (20°C/68°F), body temperature (37°C/98.6°F), and extreme weather conditions like -40°C (-40°F). These points provide a quick reference for everyday applications. Additionally, include intervals that cover typical cooking, baking, and weather-related temperatures. Highlighting these key conversions makes the chart more practical and useful for various scenarios, ensuring it serves as a reliable tool for rapid temperature comparisons and calculations.

Downloading and Using the PDF Chart

Easily access the Centigrade to Fahrenheit chart PDF online, download it for free, and print it for quick temperature conversions. Use it as a handy reference guide.

How to Access the PDF Chart Online

Accessing the Centigrade to Fahrenheit chart PDF is straightforward. Simply search for “Centigrade to Fahrenheit chart PDF” on a reliable search engine like Google. Browse the results to find a trusted source, such as educational or scientific websites, offering free downloads. Click the download link to save the PDF to your device. Ensure the chart is printable and includes a clear temperature range for easy reference. Many websites provide high-quality, downloadable charts without requiring registration or payment. Once downloaded, you can print it for offline use or keep it digitally for quick conversions. This convenient resource is ideal for students, professionals, and anyone needing frequent temperature conversions.

Printing and Utilizing the Chart for Reference

Printing the Centigrade to Fahrenheit chart PDF is a practical way to keep it handy. Ensure your printer is set to the correct dimensions to maintain clarity. Laminate the chart for durability, especially if it will be used frequently. Place it in a visible location, such as a kitchen or workshop, for quick temperature conversions. Use the chart to instantly convert temperatures without calculations. Highlight key ranges, like freezing or boiling points, for easy identification. This tool is invaluable for cooking, scientific experiments, or DIY projects. By having a printed copy, you can reference it offline, making it a reliable resource for everyday use.

ati teas study guide pdf

Welcome to the ATI TEAS Study Guide PDF, your comprehensive resource for mastering the TEAS exam. This guide offers detailed content, practice tests, and strategies to ensure success.

1.1 Overview of the ATI TEAS Exam

The ATI TEAS exam is a standardized entrance test for nursing and allied health programs. It assesses reading, math, science, and English skills. The exam is divided into four sections, with a focus on practical knowledge and problem-solving. Scoring is based on correctness, and results determine academic readiness. Preparing with the ATI TEAS Study Guide ensures familiarity with the exam format and content, boosting confidence and performance.

1.2 Importance of Using a Study Guide

A study guide is essential for effective TEAS preparation. It provides structured content, practice tests, and strategies tailored to the exam format. By identifying weak areas and reinforcing strengths, it enhances knowledge retention and test-taking skills. Regular use ensures a comprehensive understanding of all sections, boosting confidence and readiness for the exam. Utilizing a study guide significantly improves scores and academic preparedness for nursing and allied health programs.

Understanding the TEAS Exam Structure

The TEAS exam assesses core academic skills in reading, mathematics, science, and English. Understanding its structure helps candidates prepare effectively and allocate study time wisely.

2.1 Sections Covered in the TEAS Exam

The TEAS exam comprises four main sections: Reading, Mathematics, Science, and English and Language Usage. Each section evaluates essential skills required for healthcare education. The Reading section tests comprehension and vocabulary, while Mathematics covers algebra, geometry, and data interpretation. Science includes biology, chemistry, and physics. English assesses grammar, syntax, and writing skills. Understanding these sections is crucial for targeted preparation and success.

2.2 Time Limit and Question Format

The TEAS exam has a total time limit of 209 minutes, divided among four sections: Reading (63 minutes), Mathematics (54 minutes), Science (63 minutes), and English (58 minutes). Questions are primarily multiple-choice, with some alternate formats like fill-in-the-blank and hotspot questions. Familiarizing yourself with the timed format and question types helps optimize your test-taking strategy and reduces anxiety on exam day.

Key Features of the ATI TEAS Study Guide PDF

The ATI TEAS Study Guide PDF offers comprehensive content coverage, practice tests, and expert strategies to build confidence and mastery of the exam material effectively.

3.1 Comprehensive Content Coverage

The ATI TEAS Study Guide PDF provides in-depth coverage of all exam sections, including Reading, Mathematics, Science, and English. It aligns with the latest TEAS Version 7 requirements.

Key concepts, formulas, and science topics are thoroughly explained, ensuring a strong foundation for success. The guide is designed to address every aspect of the test, leaving no gaps in preparation.

3.2 Practice Tests and Questions

The ATI TEAS Study Guide PDF includes full-length practice tests and hundreds of questions, mirroring the actual exam format. These resources help users familiarize themselves with question types, timing, and content distribution across sections like Reading, Mathematics, Science, and English. Detailed rationales for correct and incorrect answers are provided, enabling learners to identify and improve their weak areas effectively. Regular practice with these tests enhances confidence and readiness for the exam;

How to Use the Study Guide Effectively

Engage actively with the content, complete practice tests, and review explanations to deepen understanding. Use the guide to identify strengths and areas needing improvement systematically.

4.1 Creating a Study Schedule

A well-structured study schedule is essential for effective preparation. Allocate specific time slots for each TEAS section, ensuring regular practice and review. Start by designating daily study periods, focusing on weak areas first. Incorporate practice tests weekly to assess progress. Adjust the schedule as needed to accommodate challenging topics. Consistency and flexibility are key to mastering the material efficiently. Track progress and stay committed to achieve exam success.

4.2 Focusing on Weak Areas

Identify your weak areas through practice tests and dedicate extra study time to those topics. Break down complex subjects into smaller, manageable parts. Use targeted exercises and review materials to strengthen understanding. Regularly assess progress and adjust your study plan. By addressing weaknesses early, you can build a stronger foundation and improve overall performance. Consistent focus on these areas ensures steady growth and confidence.

Best Practices for TEAS Exam Preparation

Master the TEAS exam with proven strategies. Understand the exam format inside out and leverage online resources for targeted practice. This guide provides expert tips to boost your preparation effectively.

5.1 Understanding the Exam Format

Understanding the TEAS exam format is crucial for success. The exam is divided into four sections: Reading, Mathematics, Science, and English and Language Usage. Each section contains multiple-choice questions with varying time limits. Familiarizing yourself with the structure helps you allocate time effectively and reduces anxiety on test day. This guide provides detailed insights into each section’s format and question types to ensure you’re fully prepared.

5.2 Utilizing Online Resources

Online resources are invaluable for TEAS exam preparation. The ATI TEAS study guide PDF, along with practice tests, offers comprehensive coverage of essential content. Utilizing these tools helps you identify weak areas, track progress, and refine strategies. Interactive learning platforms and video tutorials provide additional support, ensuring a well-rounded understanding of the material. These resources complement traditional study methods, enhancing your readiness for the exam.

Benefits of Timed Practice Tests

Timed practice tests simulate exam conditions, improving time management and stamina. They help identify weaknesses, allowing focused study and boosting confidence for the actual test day.

6.1 Simulating Exam Conditions

Timed practice tests mimic the actual exam environment, helping you familiarize yourself with the exam structure and format. By practicing under time constraints, you improve your ability to manage your time effectively and reduce test-day anxiety. These tests also expose you to various question types, allowing you to understand the exam’s demands better. Regular practice under exam-like conditions builds stamina and confidence, ensuring you’re well-prepared for the real test day.

6.2 Analyzing Results for Improvement

After completing practice tests, review your results to identify areas needing improvement. Analyzing your scores helps you understand strengths and weaknesses, allowing targeted study. The rationales provided for right and wrong answers offer insights into correct thinking, enhancing your understanding of complex topics. By focusing on frequently missed question types, you can refine your strategies, ensuring a more effective study plan and better overall performance on the TEAS exam.

Strategies for Mastering TEAS Science

Focus on key science concepts, use practice tests to identify weaknesses, and review rationales for improvement. Timed practice enhances exam readiness and confidence.

7.1 Key Concepts to Review

Focus on anatomy, physiology, biology, chemistry, and physics. Review major body systems, cellular structure, genetic principles, and chemical reactions. Practice identifying processes like respiration and circulation. Understanding these foundational concepts is crucial for success. Use practice tests to pinpoint weaknesses and allocate study time effectively. The ATI guide provides detailed explanations to reinforce learning and build confidence in science-related questions.

7.2 Tips for Science Section Success

Master science terminology and concepts using flashcards. Practice identifying structures in diagrams and understanding lab simulations. Time yourself to improve speed and accuracy. Review weak areas identified through practice tests. Utilize the study guide’s explanations to clarify doubts. Stay calm during the exam and eliminate incorrect answers to increase your chances of selecting the right ones. Consistent practice ensures familiarity and confidence with the material.

Managing Time During the Exam

Effective time management is crucial for success on the TEAS exam. Create a schedule, prioritize questions, and practice under timed conditions to build confidence and efficiency.

8.1 Allocating Time per Section

Allocate time wisely for each section of the TEAS exam to ensure optimal performance. The Reading section allows 65 minutes, Mathematics 54 minutes, Science 63 minutes, and English 37 minutes. Prioritize questions you’re confident about first, then return to challenging ones if time permits. Stick to your time plan to avoid running out of time and missing questions. Practice timed sections to build stamina and focus.

8.2 Avoiding Time-Wasting Mistakes

To avoid time-wasting mistakes during the TEAS exam, adopt strategic approaches. Skim questions quickly to identify key details, and skip difficult ones initially, returning later if time allows. Avoid overthinking answers—trust your first instinct. Use the process of elimination to narrow down choices. Stick to the time allocated per question to maintain pacing. Timed practice tests can help refine these skills, ensuring efficient time management on exam day.

Understanding TEAS Scoring System

The TEAS exam is scored based on the number of correct answers, with no penalties for incorrect or skipped questions. The total possible score is 100%. Understanding this system helps set realistic goals and reduces exam-day anxiety.

9.1 How Scores are Calculated

The TEAS exam score is determined by the number of correct answers, with no deduction for incorrect or skipped questions. Each section is scored individually, and the total possible score is 100%. Understanding this system helps students set realistic goals and track progress effectively. The scoring method is straightforward, ensuring transparency and fairness for all test-takers.

9.2 Setting Realistic Score Goals

Setting realistic score goals is essential for effective preparation. Start by assessing current performance through practice tests. Identify strengths and areas needing improvement. Aim for incremental progress, aligning goals with admission requirements of target programs. Break down objectives into manageable steps, ensuring steady growth. Regularly review and adjust targets to stay motivated and track improvement. This approach helps maintain focus and builds confidence for exam day.

Common Mistakes to Avoid

Understand key pitfalls, such as misreading questions or poor time management, to enhance exam performance and build a strategic approach for success;

10.1 Misunderstanding Question Types

Failing to recognize question formats, such as multiple-choice or fill-in-the-blank, can lead to confusion. Reviewing common question types and practicing with sample questions helps build familiarity, reducing errors and improving accuracy during the exam. The guide emphasizes understanding each format to avoid misinterpretation and ensure confident responses. Regular practice with similar question styles enhances recognition and reduces exam-day stress.

10.2 Poor Time Management

Poor time management is a common pitfall, leading to incomplete sections or rushed answers. Allocate time wisely for each question and practice with timed tests to build pacing skills. Skipping difficult questions and returning later ensures no time is wasted. Effective time management boosts confidence and accuracy, helping you complete the exam efficiently without leaving questions unanswered or guessing due to time constraints.

Final Tips for Exam Day

Stay calm, arrive early, and bring necessary materials. Skim through questions quickly, manage your time wisely, and stay focused to ensure peak performance during the exam.

11.1 Staying Calm and Focused

Maintaining composure on exam day is crucial for optimal performance; Practice deep breathing exercises and positive visualization beforehand. Ensure a good night’s sleep and a nutritious meal to enhance mental clarity. Avoid last-minute cramming and trust in your preparation. Staying focused and calm will help you approach questions with confidence and clarity, ensuring you make the most of your efforts during the TEAS exam.

11.2 Reviewing Last-Minute Strategies

On exam day, briefly review key strategies to reinforce your approach. Skim through notes on time management, question formats, and common pitfalls. Focus on high-yield topics identified during practice. Ensure you understand how to approach different question types, such as multiple-choice and calculations. Visualizing success and staying positive can boost confidence and readiness, helping you tackle the TEAS exam with precision and assurance.

The ATI TEAS Study Guide PDF provides comprehensive coverage, practice tests, and strategies to help you feel confident and prepared for exam success.

12.1 Recap of Key Study Strategies

Key strategies include creating a study schedule, focusing on weak areas, and utilizing practice tests. Reviewing exam formats, managing time effectively, and staying calm are crucial. Prioritize understanding question types and avoid common mistakes. Regularly analyze results to improve performance. Consistent practice and a well-organized approach ensure confidence and readiness for the TEAS exam.

12.2 Encouragement for Success

Remember, consistent effort and dedication are key to achieving success. Believe in your abilities and stay committed to your study plan. With thorough preparation using the ATI TEAS Study Guide and practice tests, you are well-equipped to excel. Maintain a positive mindset, stay focused, and trust the process. Your hard work will pave the way for a confident and successful exam day!

gospel of thomas 114 pdf

The Gospel of Thomas 114 offers unique insights into Jesus’ teachings through 114 sayings‚ emphasizing spiritual seeking and self-discovery. Its wisdom encourages personal reflection and introspection‚ providing timeless guidance for seekers of truth.

Overview of the Gospel of Thomas

The Gospel of Thomas is a unique collection of 114 sayings attributed to Jesus‚ offering profound spiritual insights. Unlike canonical gospels‚ it lacks narrative frameworks‚ focusing instead on direct teachings. These sayings emphasize faith‚ self-discovery‚ and the pursuit of inner truth. Many parallels exist with synoptic gospels‚ yet its distinct voice provides fresh perspectives. The text encourages readers to seek beyond the material world‚ fostering a deeper connection with the divine. Its concise structure makes it accessible for personal reflection and theological study. Discovered in Nag Hammadi‚ Egypt‚ in 1945‚ the Gospel of Thomas has sparked significant scholarly and spiritual interest‚ blending ancient wisdom with contemporary relevance for seekers of truth.

Significance of the 114 Sayings

The 114 sayings in the Gospel of Thomas hold profound spiritual and historical significance. They offer unique insights into Jesus’ teachings‚ emphasizing faith‚ self-discovery‚ and the pursuit of inner truth. Many sayings parallel those in the synoptic gospels‚ suggesting a shared tradition‚ while others provide distinct perspectives. The text encourages readers to seek truth beyond the material world‚ fostering a deeper connection with the divine. Its structure‚ lacking narrative frameworks‚ focuses on direct teachings‚ making it accessible for personal reflection and theological study. The sayings provoke thought and encourage forming one’s own understanding of spiritual truths. Their enduring relevance is evident in contemporary interpretations‚ addressing personal and theological implications. Each saying contributes to a broader message of spiritual seeking and self-discovery‚ making the collection a valuable resource for scholars and spiritual seekers alike.

Historical Background of the Gospel of Thomas

The Gospel of Thomas‚ discovered in 1945‚ is part of the Nag Hammadi Codex II. Its Coptic manuscript dates to the 2nd century‚ offering 114 sayings of Jesus.

Discovery and Manuscripts

The Gospel of Thomas was discovered in 1945 near Nag Hammadi‚ Egypt‚ as part of a collection of Gnostic texts. It is written in Coptic‚ the latest stage of the ancient Egyptian language‚ and is part of Codex II‚ one of the thirteen leather-bound books found in the Nag Hammadi library. The manuscript dates back to the 4th century and contains all 114 sayings attributed to Jesus. Scholars have identified earlier Greek fragments of the Gospel of Thomas‚ such as those found in Oxyrhynchus‚ which predate the Nag Hammadi version. These fragments suggest that the text was widely circulated in the early Christian period. The discovery and subsequent translation of the Gospel of Thomas have provided significant insights into early Christian thought and Gnostic traditions‚ making it a valuable resource for theological and historical studies.

Authorship and Dating

The authorship of the Gospel of Thomas is traditionally attributed to Didymus Judas Thomas‚ often identified as the twin brother of Jesus. However‚ scholars widely debate its actual authorship‚ as the text likely reflects the theological perspectives of early Christian communities rather than a single individual. The dating of the Gospel of Thomas is also contentious‚ with estimates ranging from the 1st to the 2nd century AD. Some scholars argue that its core sayings may predate the canonical Gospels‚ while others propose a later composition influenced by Gnostic thought. The Nag Hammadi manuscript‚ which contains the full text of the Gospel of Thomas‚ dates to the 4th century‚ but the original Greek versions of some sayings may have circulated earlier. The text’s theological orientation‚ whether proto-Gnostic or mainstream Christian‚ further complicates its historical placement.

Key Themes and Teachings in the Gospel of Thomas 114

The Gospel of Thomas 114 emphasizes faith‚ spiritual seeking‚ and self-discovery‚ encouraging followers to seek truth within. Its teachings highlight inner light and personal reflection as pathways to enlightenment.

Sayings on Faith and Spiritual Seeking

The Gospel of Thomas 114 contains profound sayings that emphasize the importance of faith and relentless spiritual seeking. Jesus encourages followers to pursue truth without ceasing‚ as seen in the saying‚ “Whoever seeks should not stop until they find.” This teaching underscores the necessity of perseverance in the spiritual journey. Another notable saying‚ “Whoever is near me is near the fire‚” suggests proximity to divine truth ignites inner transformation. These teachings prompt believers to look beyond the material world‚ fostering a deep‚ personal connection with the divine. The sayings also highlight the hidden nature of truth‚ urging seekers to uncover it through faith and introspection. This focus on spiritual seeking makes the Gospel of Thomas 114 a compelling guide for those pursuing enlightenment and a deeper understanding of Jesus’ message.

Teachings on Self-Discovery and Inner Light

The Gospel of Thomas 114 places great emphasis on self-discovery and the illumination of the inner light. Jesus’ sayings encourage individuals to look inward to uncover divine truth‚ as expressed in the phrase‚ “The kingdom is inside you‚ and it is outside you.” This duality highlights the interconnectedness of the inner and outer realms. Another saying‚ “When you know yourselves‚ then you will be known‚” underscores the importance of self-awareness as a path to spiritual enlightenment. These teachings suggest that true understanding and salvation come from recognizing the divine within oneself. By fostering introspection and personal insight‚ the Gospel of Thomas 114 offers a unique perspective on spiritual growth‚ guiding readers to embrace their inner light and find their true selves. This focus on self-discovery makes the text a powerful tool for personal transformation and spiritual awakening.

Modern Relevance and Interpretations

The Gospel of Thomas 114 resonates in contemporary times‚ offering fresh perspectives on spirituality and personal growth. Its teachings inspire modern seekers to explore inner truth and divine connection.

Contemporary Scholarship and Analysis

Contemporary scholars examine the Gospel of Thomas 114 for its theological depth and historical context. New Testament experts like Simon Gathercole explore its sayings‚ revealing insights into early Christianity. The text’s relevance is underscored by its focus on spiritual seeking and inner light. Scholars highlight parallels with synoptic gospels‚ noting unique perspectives that challenge traditional interpretations. The Gospel of Thomas is seen as a valuable resource for understanding Jesus’ teachings beyond the canonical texts. Its 114 sayings continue to inspire academic and personal reflection‚ offering a bridge between ancient wisdom and modern spirituality.

Personal and Theological Implications

The Gospel of Thomas 114 holds profound personal and theological implications‚ inviting readers to embrace a path of self-discovery and spiritual awakening. Its teachings emphasize the importance of seeking truth within‚ challenging followers to move beyond dogma. The sayings encourage individuals to find the divine spark within themselves‚ fostering a direct relationship with the divine. Theologically‚ the text questions traditional authority‚ promoting a more intimate and personal spirituality. For many‚ the Gospel of Thomas serves as a transformative guide‚ offering insights into the nature of faith‚ existence‚ and enlightenment. Its message transcends denominational boundaries‚ resonating with seekers from diverse backgrounds.

Accessing and Studying the Gospel of Thomas 114 PDF

Accessing the Gospel of Thomas 114 PDF is straightforward‚ with numerous online resources offering the text for free or purchase. Academic databases‚ religious websites‚ and online archives provide digital versions‚ often accompanied by translations and commentaries. For in-depth study‚ readers can utilize study guides‚ scholarly articles‚ and audio lectures that explore the historical and theological context of the 114 sayings. Additionally‚ modern platforms like e-bookstores and religious apps offer convenient access to the Gospel of Thomas in various formats. To enhance understanding‚ pairing the PDF with scholarly interpretations and reflective practices can deepen one’s engagement with the teachings. This accessibility makes the Gospel of Thomas 114 a valuable resource for both personal spirituality and academic research.

marathon clock manual

Welcome to the Marathon Clock Manual, your comprehensive guide to understanding and operating your Marathon timepiece. This manual covers setup, features, and maintenance to ensure optimal performance and accuracy.

1.1 Overview of the Marathon Clock

The Marathon Clock is a radio-controlled atomic digital clock designed for precision and ease of use. Featuring a sleek, jumbo profile, it offers automatic time synchronization, manual adjustments, and a perpetual calendar. Additionally, it includes temperature and humidity sensors, making it a versatile and practical timekeeping solution. This overview highlights the clock’s core functionalities, ensuring users understand its capabilities and how to maximize its features for accurate timekeeping and environmental monitoring.

1.2 Key Features of the Marathon Clock

The Marathon Clock boasts an array of innovative features, including automatic atomic time synchronization for precise accuracy, a perpetual calendar, and manual adjustment capabilities. It also includes temperature and humidity sensors, providing environmental monitoring. Additionally, the clock offers alarm and timer functions, enhancing its utility. With its large, easy-to-read display and sleek design, the Marathon Clock is both functional and stylish, making it a versatile addition to any setting.

Setting Up the Marathon Clock

Unboxing and initial setup involve simple steps to ensure optimal performance. Mounting the clock on the wall is straightforward, and the manual provides clear installation guidance for accuracy.

2.1 Unboxing and Initial Setup

Welcome to your Marathon Clock Manual! Upon unboxing, carefully remove the clock and accessories. Ensure all components, including the mounting hardware and user manual, are included. Begin by placing the clock on a flat surface or proceed to mount it on the wall. Press and hold the SET key for 2 seconds to activate the initial setup mode. The display will flash, indicating the start of the configuration process. Use the UP or DOWN buttons to cycle through options, adjusting time, date, and other settings as needed. Refer to the manual for detailed guidance to ensure proper setup and functionality. Proper initial setup is crucial for accurate timekeeping and optimal performance. Follow these steps carefully to enjoy your Marathon Clock’s features fully.

2.2 Mounting the Clock on the Wall

To mount your Marathon Clock, locate a sturdy wall stud using a stud finder. Drill pilot holes aligned with the clock’s mounting hardware. Insert screws into the wall and hang the clock, ensuring it is level. Use a spirit level tool for accuracy. Tighten the screws firmly to secure the clock. Avoid over-tightening to prevent damage. Once mounted, check the clock’s alignment and adjust if necessary. Ensure the clock is stable and securely fastened to the wall for optimal performance and safety.

Time Setting Options

The Marathon Clock offers automatic time synchronization via atomic signal for precise accuracy. Manual adjustment is also available, allowing users to set time and date effortlessly when needed.

3.1 Automatic Time Synchronization via Atomic Signal

The Marathon Clock features automatic time synchronization via an atomic signal, ensuring precise accuracy. It receives updates from the National Institute of Standards and Technology (NIST), adjusting for daylight saving time and time zones. This self-setting capability eliminates manual adjustments, providing reliable timekeeping. The clock also includes a perpetual calendar, updating dates automatically. With advanced signal reception, it maintains accuracy even in varying conditions, making it a dependable choice for precise timekeeping needs.

3.2 Manual Time Adjustment Instructions

To manually adjust the time on your Marathon Clock, press and hold the SET button for 2 seconds. Use the UP or DOWN arrows to select the desired time. The flashing digit indicates the current setting. Adjust the hour, minute, and second as needed. Once set, press SET to save. This feature is useful when atomic signal reception is weak or unavailable. Ensure accurate timekeeping by following these simple steps.

Calendar and Date Settings

The Marathon Clock features a perpetual calendar from 2000 to 2099. To manually adjust the date, hold the CLOCK SET UP button for 3 seconds. Select the desired date using the UP or DOWN buttons. The clock supports multiple languages, including English, Spanish, and French, ensuring versatility for users worldwide.

4.1 Perpetual Calendar Features

The Marathon Clock includes a perpetual calendar spanning from the year 2000 to 2099. This feature automatically updates dates, including leap years, ensuring accuracy without manual intervention. The clock displays the date alongside the time and offers language options like English, Spanish, French, and more. Its advanced programming handles month lengths and leap years seamlessly, providing a hassle-free experience for users. This feature enhances convenience and reliability, making it a standout function of the Marathon Clock.

4.2 Adjusting the Date Manually

To manually adjust the date on your Marathon Clock, press and hold the CLOCK SET UP button for 3 seconds to enter the setup mode. Use the UP or DOWN buttons to navigate to the date settings. Select the desired day, month, and year using the arrow keys. Once adjusted, press the SET button to save your changes. The clock will exit setup mode automatically, ensuring your date is accurately displayed. This feature is useful when the perpetual calendar needs manual correction.

Additional Features of the Marathon Clock

The Marathon Clock includes advanced features like temperature and humidity sensors, providing real-time environmental data. It also offers an alarm and timer function for added convenience and functionality.

5.1 Temperature and Humidity Sensors

The MARATHON Clock features built-in temperature and humidity sensors, providing accurate real-time environmental data. These sensors automatically monitor and display indoor conditions, ensuring optimal comfort. The temperature is shown in degrees Celsius or Fahrenheit, while humidity levels are displayed as a percentage. This feature is particularly useful for tracking indoor climate conditions, making it ideal for home or office use. Some models also include outdoor temperature monitoring for comprehensive environmental tracking.

5.2 Alarm and Timer Functions

The MARATHON Clock includes convenient alarm and timer functions for daily use. Set up to three alarms with optional weekends exclusion. The timer function allows you to set countdown intervals, perfect for cooking or workouts; Alarms can be tailored with different tones and snooze options. Some models also feature a volume-adjustable alarm. These functions enhance productivity and simplify time management, making the clock a versatile addition to any setting. Use the provided buttons to easily navigate and customize these features.

Maintenance and Troubleshooting

Regularly clean the display with a soft cloth to maintain clarity. Ensure the clock receives a strong atomic signal for accurate timekeeping. Check battery levels periodically and reset if issues arise.

6.1 Replacing Batteries

To ensure uninterrupted performance, replace the batteries as follows:
– Use high-quality AA alkaline batteries for optimal power.
– Open the battery compartment located on the back.
– Insert the new batteries, matching the polarity signs.
– Close the compartment securely to avoid moisture entry.
– Dispose of old batteries responsibly.
– If the clock doesn’t restart, reset it by holding the SET button for 5 seconds.

– Battery replacement maintains accurate timekeeping and feature functionality.

6.2 Common Issues and Solutions

Addressing common issues ensures your Marathon Clock performs optimally:
– If the clock fails to sync with the atomic signal, move it near a window or check for signal strength in your area.
– For a dim display, adjust the brightness settings or replace the batteries.
– If the date is incorrect, manually adjust it via the SET button.
– Reset the clock by holding the SET button for 5 seconds if it malfunctions.
– Ensure proper battery installation to avoid power-related issues.
– Regularly update settings to maintain accuracy and functionality.

Marathon Clock User FAQs

Frequently asked questions about the Marathon Clock include inquiries on resetting, manual adjustments, and feature toggling. Find answers to common queries for seamless operation.

7.1 How to Reset the Clock

To reset the Marathon Clock, press and hold the CLOCK SET UP button for 3 seconds to enter the setup mode. Use the UP or DOWN buttons to navigate to the reset option. Select RESET and confirm to restore default settings. The clock will automatically synchronize with the atomic signal for accurate timekeeping. This process ensures your clock is recalibrated and functioning properly.

7.2 How to Enable/Disable Certain Features

To enable or disable features on your Marathon Clock, press and hold the SET button until the settings menu appears. Use the UP or DOWN buttons to navigate to the desired feature, such as the alarm or temperature display. Press the SET button to toggle the feature on or off. For example, disable the alarm by selecting it and pressing SET until the alarm icon disappears. Save your preferences by exiting the menu. This allows customization of your clock’s functionality to suit your needs.

Advanced Customization Options

Explore advanced customization options for your Marathon Clock, including display settings and time zone adjustments, to tailor your clock to your preferences and environment.

8.1 Changing Display Settings

To customize your Marathon Clock’s display, press and hold the DISPLAY button to cycle through brightness levels. Use the UP or DOWN buttons to adjust brightness or toggle between 12/24-hour formats. Some models allow switching between date, temperature, and humidity displays. For atomic clocks, ensure the atomic signal is received before adjusting display settings. Refer to your specific model’s manual for additional display customization options, as features may vary.

8.2 Adjusting Time Zones

To adjust the time zone on your Marathon Clock, press and hold the SET button until the time zone option appears. Use the UP or DOWN buttons to cycle through available time zones. For atomic clocks, ensure the device receives the atomic signal before adjusting. Some models may require entering setup mode by pressing and holding the CLOCK SET UP button. Adjustments may vary depending on your clock’s features and model. Refer to your specific manual for detailed instructions.

Marathon Clock Warranty and Support

To adjust the time zone on your Marathon Clock:

Locate the SET button on the back of the clock.
Press and hold the SET button for a few seconds until the time zone option appears.
Use the UP and DOWN buttons to cycle through the available time zones.
Once the desired time zone is selected, press the SET button again to save the changes.
Ensure the clock receives the atomic signal for automatic time updates. Check the display for signal strength indicators and adjust the clock’s position if necessary for a stronger signal.

9.1 Warranty Information

Your Marathon Clock is backed by a limited warranty covering manufacturing defects in materials and workmanship. The warranty period typically lasts for two years from the date of purchase. To validate the warranty, ensure your clock is registered on the manufacturer’s website. Coverage includes repairs or replacements at no additional cost for defective parts. Exclusions apply for damages caused by misuse, accidents, or unauthorized modifications. Refer to the full warranty terms provided with your purchase for detailed conditions.

9.2 Contacting Customer Service

For assistance with your Marathon Clock, contact our customer service team via phone, email, or through the official website. Support is available Monday to Friday, 9 AM to 5 PM EST. Visit the Marathon Watch website for contact details and live chat options. Ensure to have your product serial number ready for efficient service. Our team is ready to address inquiries, repair requests, and provide troubleshooting guidance to ensure your clock operates at its best.

10.1 Final Tips for Using the Marathon Clock

Regularly check battery levels and replace them as needed to maintain accuracy. Ensure the clock is placed away from direct sunlight to avoid display issues. For optimal performance, keep the clock in an area with strong atomic signal reception. Refer to the manual for troubleshooting common issues. Clean the display gently with a soft cloth to maintain visibility. Store the manual in an accessible location for future reference. Happy timekeeping!

10.2 Importance of Regular Maintenance

Regular maintenance ensures your Marathon Clock operates accurately and efficiently. Check battery levels periodically to prevent time synchronization issues. Clean the display with a soft cloth to maintain visibility. Ensure proper signal reception for atomic time updates. Address any discrepancies in time or date promptly. Refer to the manual for troubleshooting guidance. Regular upkeep extends the lifespan of your clock and guarantees reliable performance for years to come.

char broil electric smoker manual

Welcome to the Char-Broil Electric Smoker Manual, your guide to mastering delicious, smoke-infused meals. This manual covers models like the Digital Electric Smoker with SmartChef Technology, providing essential safety tips, assembly instructions, and operating guidelines to ensure optimal performance and flavor.

1.1 Understanding the Importance of the Manual

The Char-Broil Electric Smoker Manual is a crucial resource for safe and effective use of your smoker. It provides detailed safety guidelines, such as using GFI-protected circuits and keeping the unit dry, to prevent electrical hazards. The manual also outlines assembly steps, seasoning processes, and operating modes, ensuring proper setup and functionality. By following the manual, users can understand temperature control, cooking techniques, and maintenance tips to achieve optimal results. Additionally, it addresses troubleshooting common issues, helping you resolve problems quickly. Reading the manual thoroughly ensures you maximize your smoker’s performance while adhering to essential safety practices. It’s a comprehensive guide designed to enhance your smoking experience and protect your investment.

1.2 Key Features of the Char-Broil Electric Smoker

The Char-Broil Electric Smoker stands out for its advanced features designed to enhance your smoking experience. It includes digital temperature control, allowing precise adjustments for consistent results. The SmartChef Technology offers guided cooking modes, helping you achieve perfect smoke levels. Manual mode provides flexibility for experienced users to customize settings. Safety features like GFI protected circuits ensure electrical safety. The smoker also includes a wood chip tray for easy flavor customization and a durable construction for long-lasting performance. These features make it user-friendly and versatile, catering to both beginners and seasoned smokers. The comprehensive design ensures efficient cooking while maintaining ease of use, making it a top choice for outdoor cooking enthusiasts.

Safety Precautions and Guidelines

Always follow safety guidelines to ensure safe and effective operation. Use GFI-protected circuits, keep the smoker dry, and avoid water exposure. Never modify the grounding plug or use adapters that remove ground protection. Ensure electric plugs remain off the ground and dry. Avoid using the smoker near water bodies or in enclosed spaces. Regularly inspect cords and connections for damage. Unplug the smoker when not in use or before cleaning. These precautions help prevent electrical hazards and ensure a safe cooking experience.

2.1 General Safety Tips for Electric Smokers

Always prioritize safety when using your Char-Broil Electric Smoker. Ensure the unit is placed on a stable, heat-resistant surface away from flammable materials. Keep children and pets at a safe distance. Avoid using the smoker in enclosed spaces or near water sources, such as pools or ponds, to prevent accidents. Never submerge the smoker or its components in water or use liquid to clean it. Regularly inspect the power cord and plugs for damage. Avoid overloading circuits, and ensure the smoker is used only with GFI-protected outlets. Never modify the grounding plug or use adapters that remove ground protection. These precautions help ensure safe and efficient operation.

2.2 Electrical Safety and Ground Fault Protection

Electrical safety is paramount when operating your Char-Broil Electric Smoker. Always use the smoker with a Ground Fault Interrupter (GFI)-protected circuit to prevent electrical shocks. Keep the smoker and its controller dry, avoiding exposure to rain or moisture. Never submerge the unit in water or use liquid-based cleaning methods. Ensure the power cord and plugs are free from damage and avoid overloading circuits. Never remove the grounding plug or use adapters that bypass ground protection, as this could lead to electrical hazards. Unplug the smoker when not in use or during cleaning to minimize risks. Adhere to these guidelines to ensure safe operation and protect against potential electrical hazards.

Assembly and Initial Setup

Start by carefully unpacking and inventorying all parts. Season the smoker before first use, following the manual’s instructions. Ensure all electrical connections are secure and dry.

3.1 Unpacking and Inventory of Parts

Begin by carefully unpacking your Char-Broil Electric Smoker and inspecting all components for damage. Refer to the manual’s parts list to ensure all items are included, such as the smoker body, shelves, and electric controller. Verify the presence of accessories like the power cord, wood tray, and water pan. If any parts are missing or damaged, contact customer support immediately. Properly organizing the components prevents assembly delays. Always follow the manual’s unpacking instructions to avoid accidental damage. Ensure all items are accounted for before proceeding to assembly or seasoning. This step ensures a smooth setup process and optimal performance of your smoker.

3.2 Seasoning Your Smoker for First Use

Seasoning your Char-Broil Electric Smoker is crucial before its first use to remove any manufacturing residues and prepare the surfaces for cooking. Plug in the smoker and set it to its highest temperature setting. Allow it to run for two hours with the doors closed. Afterward, turn it off and let it cool. This process ensures a clean, smoke-ready interior. For optimal results, follow the manual’s specific seasoning instructions, which may include recommended wood types for initial use. Proper seasoning enhances flavor and longevity of your smoker, ensuring it’s ready for delicious meals ahead.

Operating the Char-Broil Electric Smoker

Mastering your Char-Broil Electric Smoker involves understanding its guided and manual cooking modes. Set your desired temperature and timer, then let the smoker work its magic, ensuring perfectly smoked dishes every time with minimal effort required for consistent, flavorful results.

4.1 Cooking Modes: Guided vs. Manual

The Char-Broil Electric Smoker offers two cooking modes: Guided and Manual. In Guided mode, the smoker guides you through pre-set options for meat type, wood flavor, and temperature, simplifying the process for beginners. This mode ensures consistent results by automatically adjusting settings based on your selections. For experienced users, Manual mode provides full control, allowing you to customize temperature, cooking time, and smoke levels to achieve specific flavors. Both modes are designed for ease of use, with clear digital controls and real-time monitoring. Whether you prefer hands-off convenience or precise customization, the Char-Broil Electric Smoker adapts to your cooking style, ensuring delicious outcomes every time. Always ensure the smoker is used in a well-ventilated area and keep it dry for optimal performance and safety;

4.2 Setting Temperature and Timer

Setting the temperature and timer on your Char-Broil Electric Smoker is straightforward. Use the digital control panel to select your desired temperature, which ranges from 100°F to 350°F, depending on the model. Once set, the smoker maintains consistent heat for even cooking. The timer function allows you to set a specific cooking duration, ensuring your meat is perfectly smoked without constant monitoring. For manual mode, you can adjust both temperature and timer to customize your cooking experience. Always preheat the smoker for 30 minutes before adding food for optimal results. Remember to unplug the unit when not in use and keep electrical components dry to ensure safety and longevity. Proper temperature and timer settings are key to achieving tender, flavorful dishes with minimal effort.

Maintenance and Troubleshooting

Regularly clean your Char-Broil Electric Smoker to prevent residue buildup. Store it in a dry place to avoid damage. Refer to the manual for common issues and solutions to ensure optimal performance and longevity of your smoker.

5.1 Cleaning and Storage Tips

Regular cleaning is essential for maintaining your Char-Broil Electric Smoker. After each use, wipe down the interior with a damp cloth and remove any food residue. Avoid using water directly on electrical components. For tougher messes, a wire brush can help scrub grates and surfaces. After cleaning, ensure all parts are dry before storage. Store the smoker in a dry, well-ventilated area to prevent rust or mold. Unplug the smoker when not in use and keep the power cord dry. For long-term storage, cover the smoker to protect it from dust and moisture. Proper cleaning and storage will extend the lifespan of your smoker and ensure optimal performance for future cooking sessions.

5.2 Common Issues and Solutions

Common issues with the Char-Broil Electric Smoker may include uneven temperature, electrical malfunctions, or rust formation. To address temperature fluctuations, ensure proper ventilation and check for blockages in vents. For electrical issues, verify that the smoker is plugged into a GFI-protected outlet and avoid using damaged cords. If rust appears, sand the area and reseason the smoker. Regular cleaning and drying can prevent rust. If the smoker does not turn on, check the power connection and circuit breaker. Consult the manual for specific troubleshooting steps. Proper maintenance and adherence to safety guidelines can resolve most issues and ensure optimal performance. Always refer to the manual for detailed solutions and warranty information.

como rezar el rosario con letanías pdf

Discover how to deepen your faith by incorporating litanies into the Rosary prayer. This guide offers a structured approach to praying with devotion, combining meditation and supplication for mindfulness and spiritual growth.

Overview of the Rosary and Its Significance

The Rosary is a revered Catholic devotion, combining prayer and meditation on the life of Jesus and Mary. It consists of 20 mysteries divided into four sets: Joyful, Luminous, Sorrowful, and Glorious. Each mystery reflects pivotal events in their lives, fostering contemplation and spiritual connection. The Rosary is not only a tool for seeking Mary’s intercession but also a means to deepen faith, foster mindfulness, and seek divine guidance. Its significance lies in its ability to unite believers in prayer, reflecting on sacred history while seeking peace and grace.

Why Incorporate Litanies into the Rosary Prayer

Incorporating litanies into the Rosary enriches the prayer experience, providing a structured way to express devotion and seek divine intercession. Litanies, such as the Litany of Loreto, invite participants to invoke Mary’s aid and reflect on her virtues. This practice deepens meditation, fostering a sense of communal prayer and spiritual connection. By blending litanies with the Rosary, believers can enhance their worship, align with tradition, and create a more immersive and meaningful devotional practice that strengthens faith and nurtures a closer relationship with the divine.

The Structure of the Rosary Prayer

The Rosary prayer begins with introductory prayers, followed by a cycle of mysteries (Joyful, Luminous, Sorrowful, Glorious) and concludes with litanies, guiding devotion and reflection.

Introductory Prayers: Cross, Creed, and Initial Prayers

The Rosary begins with the Sign of the Cross, followed by the Creed, emphasizing faith in God. Next, an Our Father and three Hail Marys are prayed, seeking purity and grace; These prayers establish a sacred mindset, preparing the heart for meditation on the mysteries and litanies. They serve as a foundation for the prayer, connecting the believer to the Holy Trinity and the intercession of the Blessed Virgin Mary.

The Mysteries of the Rosary: Joyful, Luminous, Sorrowful, and Glorious

The Rosary is divided into four sets of mysteries: Joyful, Luminous, Sorrowful, and Glorious. Each mystery reflects on pivotal events in the lives of Jesus and Mary. The Joyful Mysteries celebrate the Annunciation and Nativity, while the Luminous Mysteries focus on Jesus’ public life. The Sorrowful Mysteries contemplate His Passion, and the Glorious Mysteries honor His resurrection and Mary’s assumption. These meditations guide prayerful reflection, fostering a deeper connection to the divine and the Virgin Mary’s intercession.

The Role of Litanies in the Rosary

Litanies serve as intercessory prayers, invoking Mary’s aid and expressing devotion. They provide a structured way to ask for blessings and protection, enriching the Rosary with deeper supplication and faith expression.

Understanding the Litany of Loreto

The Litany of Loreto, a revered Catholic devotion, honors the Virgin Mary through a series of invocations and responses. Originating from the Italian town of Loreto, it is traditionally recited after the Rosary, invoking Mary’s titles and graces. Each petition, such as “Queen of the Most Holy Rosary,” reflects her divine role, seeking her intercession. This litany fosters a deeper connection to Mary’s maternal care and spiritual guidance, enriching prayer life with devotion and supplication.

How to Integrate Litanies into the Rosary

Integrating litanies into the Rosary enriches prayer by adding invocations and responses. After reciting each decade, transition into the Litany of Loreto, invoking titles like “Queen of the Most Holy Rosary.” This practice deepens meditation and supplication, fostering devotion. Conclude with a final prayer, such as the “Salve Regina,” to seek Mary’s intercession. This harmonious blend of prayer and reflection enhances spiritual focus and connection to the mysteries of the Rosary.

Practical Tips for Daily Rosary Prayer

Establish a peaceful environment, use a PDF guide for focus, and maintain consistency. Incorporate traditional invocations to enhance mindfulness and deepen your spiritual practice daily.

Choosing the Right Time and Environment

Find a quiet, distraction-free space for prayer, ideally with sacred objects like a crucifix or statue. Pray at consistent times, such as morning or evening, to establish a routine. Use a Rosary PDF guide to stay focused and follow the structure seamlessly. Create a reverent atmosphere by dimming lights or playing soft hymns. This setup fosters mindfulness and deepens meditation, helping you connect more profoundly with the mysteries and litanies of the Rosary.

Using PDF Guides for Consistency and Focus

PDF guides provide a structured format for praying the Rosary with litanies, ensuring consistency and focus. They outline the Mysteries, prayers, and litanies clearly, helping you stay on track. Many guides include the Litany of Loreto, allowing seamless integration into your devotion. Accessible on smartphones or print, they offer convenience for daily prayer. Using a PDF guide enhances your ability to meditate deeply on each mystery, fostering a more meaningful and disciplined prayer practice.

The Importance of the Rosary in Spiritual Life

The Rosary is a cornerstone of Catholic devotion, offering a meditative reflection on the life of Christ and the Virgin Mary. Its rhythmic prayers foster mindfulness and a connection to divine grace, while the mysteries provide a narrative thread for spiritual growth. Regular recitation of the Rosary deepens one’s faith, promotes inner peace, and strengthens one’s relationship with the divine, making it an essential practice for spiritual enrichment and guidance in daily life.

Spiritual Benefits of Praying the Rosary

Praying the Rosary offers profound spiritual benefits, fostering meditation, peace, and a deeper connection to faith. It provides a structured way to reflect on the life of Christ and Mary, promoting mindfulness and devotion. The Rosary’s rhythmic prayers create a calming effect, helping believers seek refuge in Mary’s intercession and guidance. Regular recitation strengthens spiritual discipline, nurtures a sense of community, and invites grace into daily life, while its traditions and mysteries enrich one’s understanding of divine love and redemption.

Tradition and Promises Associated with the Rosary

The Rosary, a timeless devotion, carries rich traditions and divine promises. According to the Virgin Mary’s 15 promises, those who pray the Rosary faithfully receive blessings like spiritual protection, grace in life, and eternal salvation. This sacred prayer fosters a deep connection to Mary’s intercession and Christ’s life. Its traditions, rooted in centuries of faith, offer solace, guidance, and strength. Reciting the Rosary with litanies enhances its spiritual impact, inviting grace and peace into one’s life while honoring the mysteries of the faith.

Concluding the Rosary Prayer

The Rosary concludes with final prayers, including the Salve Regina and a heartfelt reflection. These prayers invoke Mary’s intercession, sealing the devotion with grace and spiritual renewal.

Final Prayers and Reflections

The Rosary concludes with the Salve Regina and a final blessing, inviting Mary’s intercession. Reflect on the mysteries prayed, seeking grace and spiritual renewal. This moment seals the prayer, offering thanksgiving and petition for protection, while deepening devotion and fostering inner peace through meditation on the life of Christ and Mary.

Blessings and Closing Invocations

The Rosary concludes with the Salve Regina, a prayer to Mary seeking her protection and blessings. A final blessing is invoked, often through the Sign of the Cross, to seal the prayer with divine favor. This moment emphasizes gratitude and petition, asking for protection and guidance. The closing invocation reinforces the prayer’s intention to seek grace and remain under God’s loving care, bringing the devotion to a meaningful and reverent close.

Resources for Downloading Rosary PDF Guides

Find reliable PDF guides for praying the Rosary with litanies on official Catholic websites or trusted spiritual portals. These resources include structured prayers and mysteries for devotion.

Recommended PDF Materials for the Rosary with Litanies

Download comprehensive PDF guides that include the Rosary with litanies, offering structured prayers and mysteries for deeper devotion. These materials often feature the Litany of Loreto, traditional prayers, and reflections for each mystery. Many guides are available in multiple languages, ensuring accessibility for global devotees. They also include introductory prayers, such as the Apostles’ Creed and Our Father, followed by the joyful, luminous, sorrowful, and glorious mysteries. These resources are ideal for both individual and communal prayer, fostering a meaningful spiritual practice.

Look for PDFs that incorporate the Fatima prayer and closing invocations, providing a complete prayer experience. Some guides also include optional devotions, such as the Litany of the Blessed Virgin Mary, to enhance your Rosary practice. These materials are widely available on trusted Catholic websites and spiritual platforms, ensuring authenticity and fidelity to tradition.

Where to Find Reliable and Blessed Resources

Access trusted Rosary guides with litanies through official Catholic websites and spiritual platforms. The Vatican’s website offers authentic PDF materials, while sites like EWTN and the Fatima Center provide comprehensive resources. Many parishes and Catholic organizations publish downloadable guides, ensuring fidelity to tradition. Look for PDFs approved by the Holy See or recommended by religious institutions for a spiritually enriching experience.